by Craig | Oct 11, 2016 | Interior Painting
Toronto is putting up condos like crazy! Unlike a single family dwelling, there are many rules that condo dwellers must abide by. These rules are designed to make living in such close proximity to your neighbor easier and more enjoyable. However, having tradespeople in to do work in your dwelling needs extra care and attention. After all, condos and renos do go hand in hand, but keeping in mind the needs and considerations below will help make the process all the more smooth.
CAM Painters has worked in many condominium buildings across the city.
Here are our tips to make sure that your painting project goes as smooth as possible:

Toronto Condo Painting Tip #1 – Property Managers
Get to know your property manager! They will be able to tell you about any rules and regulations that trades must abide by while working in condos, here is some information you should find out:
Working hours – most condos only allow trades to work between the hours of 9:00 am to 4:00 pm. Your painter needs to know this information so that they can plan their schedule.
Visitor parking – is visitor parking available for your painter? Some painters have vehicles that are too big for underground parking, if so, is there above ground parking available. If there is no visitor parking available the cost of off-site parking will be factored into the cost by your painter.
Moving elevators – Most condos will not allow contractors to take tools up to a suite without booking a moving elevator. These elevators have padded blankets installed on the walls to minimize potential damage. If this is a rule at your building or in your downtown toronto apartments please ensure that you’ve booked the elevator in advance for the painter’s start date. Also, tentatively book the elevator for the completion date of your work, so that your painter can get their tools out of your suite when the project is complete.

Toronto Condo Painting Tip #2 – Know Your Space
Many condo dwellers have to be very creative with limited space. Therefore, if your suite has an abundance of furniture in it try moving some smaller pieces into your storage locker, if possible.
Take into consideration that your painter will have to store tools in your suite over the duration of the job. Space needs to be made available for those tools. If the weather is good a spot on the balcony is ideal, otherwise, perhaps a spare bedroom or storage area could be used. Ask your painter how big of a space they need for tool storage. Some residences may have a ground area where storage like lp smartside sheds is able to be built, to help with storing important equipment/household items that can’t fit within the current home space. It is best to look around and see what you could do to support that additional storage, to help out with a myriad of things needed for the present and future.
READ: Interior Painting: How Much Will It Cost For My Toronto Home
Also, please reference my blog post about preparing for interior painting, which has helpful tips for both condo dwellers and people living in single-family dwellings as well.
If you want to Transform your condo with lasting beauty, why not book a quote? CAM Painters has worked in many condos throughout the city and would be happy to transform yours!
by Craig | Oct 1, 2016 | DIY, General posts, Interior Painting
Years ago it was common to have varnished wood trim, or stained panelling or other natural wood features throughout the home. This was a standard in Toronto home painting and varnishing. This highlighted the natural beauty of the grain, however, it can result in a very dark look for your house.
These days many people are choosing to paint their stained or varnished wood to brighten up the interior of their home, but it’s not as simple as grabbing a brush and putting on a coat of paint. Here are some pointers if you’re thinking about painting your interior.
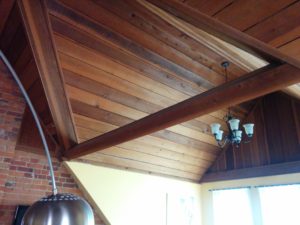
Natural wood can make an area look dark if you have varnished wood…
You’ll know if you have varnished wood by looking at it, this coating generally has a glossiness to it, and it sits on top of the surface and looks like a clear film.
Do not paint directly over top of varnished surfaces without the proper preperation! This coating is inherently unstable, it never fully cures, even though it is dry to the touch. If the paint is applied directly over it without proper preparation the paint will develop cracks as the coating underneath shifts.
READ: Should I Paint My Toronto Home Before or After Installing New Flooring?
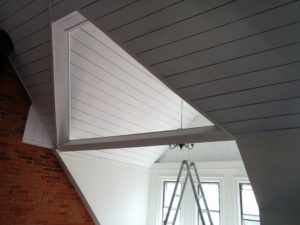
Steps for painting varnished wood
- Scuff sand the surface: We want to break open the top layer so that our primer can penetrate and grip the surface
- Prime with a high adhesion primer: I like to use Sherwin Williams Extreme Bond Primer or XIM UMA. Both primers are great at sticking to difficult surfaces. Follow the directions on the can and allow it to fully cure before the next step.
- Paint with a top quality paint: When painting trim I usually use Sherwin Williams ProClassic or Benjamin Moore Advance paints. These paints dry very hard and durable and also dry very smooth too.
If you have stained surfaces…
It’s a little easier to paint if the surface is currently stained. As you might guess, this coating soaks into the surface and doesn’t create a film on top, so getting paint to adhere is not a problem like it is with varnish.
Steps for painting stained wood
- Prime the wood with a stain blocking primer: Any oil based primer or any shellac based primer will do. I like to test an area with Sherwin Williams Multi-Purpose Water-Based Acrylic-Alkyd Primer which has the properties of oil paint with water clean up. If that doesn’t seal properly and there is discolouration on the surface, I’ll move to a regular oil primer. Finally, if the oil primer doesn’t work I’ll use a shellac based product like Zinsser BIN which is effective on all types of staining even nicotine stains, if necessary.
- Paint with a top quality paint: Once the primer has been given enough time to dry, paint with a top quality paint like I mentioned above.
All Done!
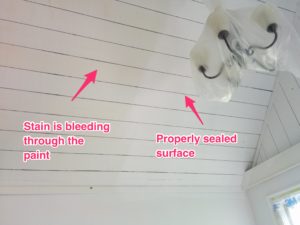
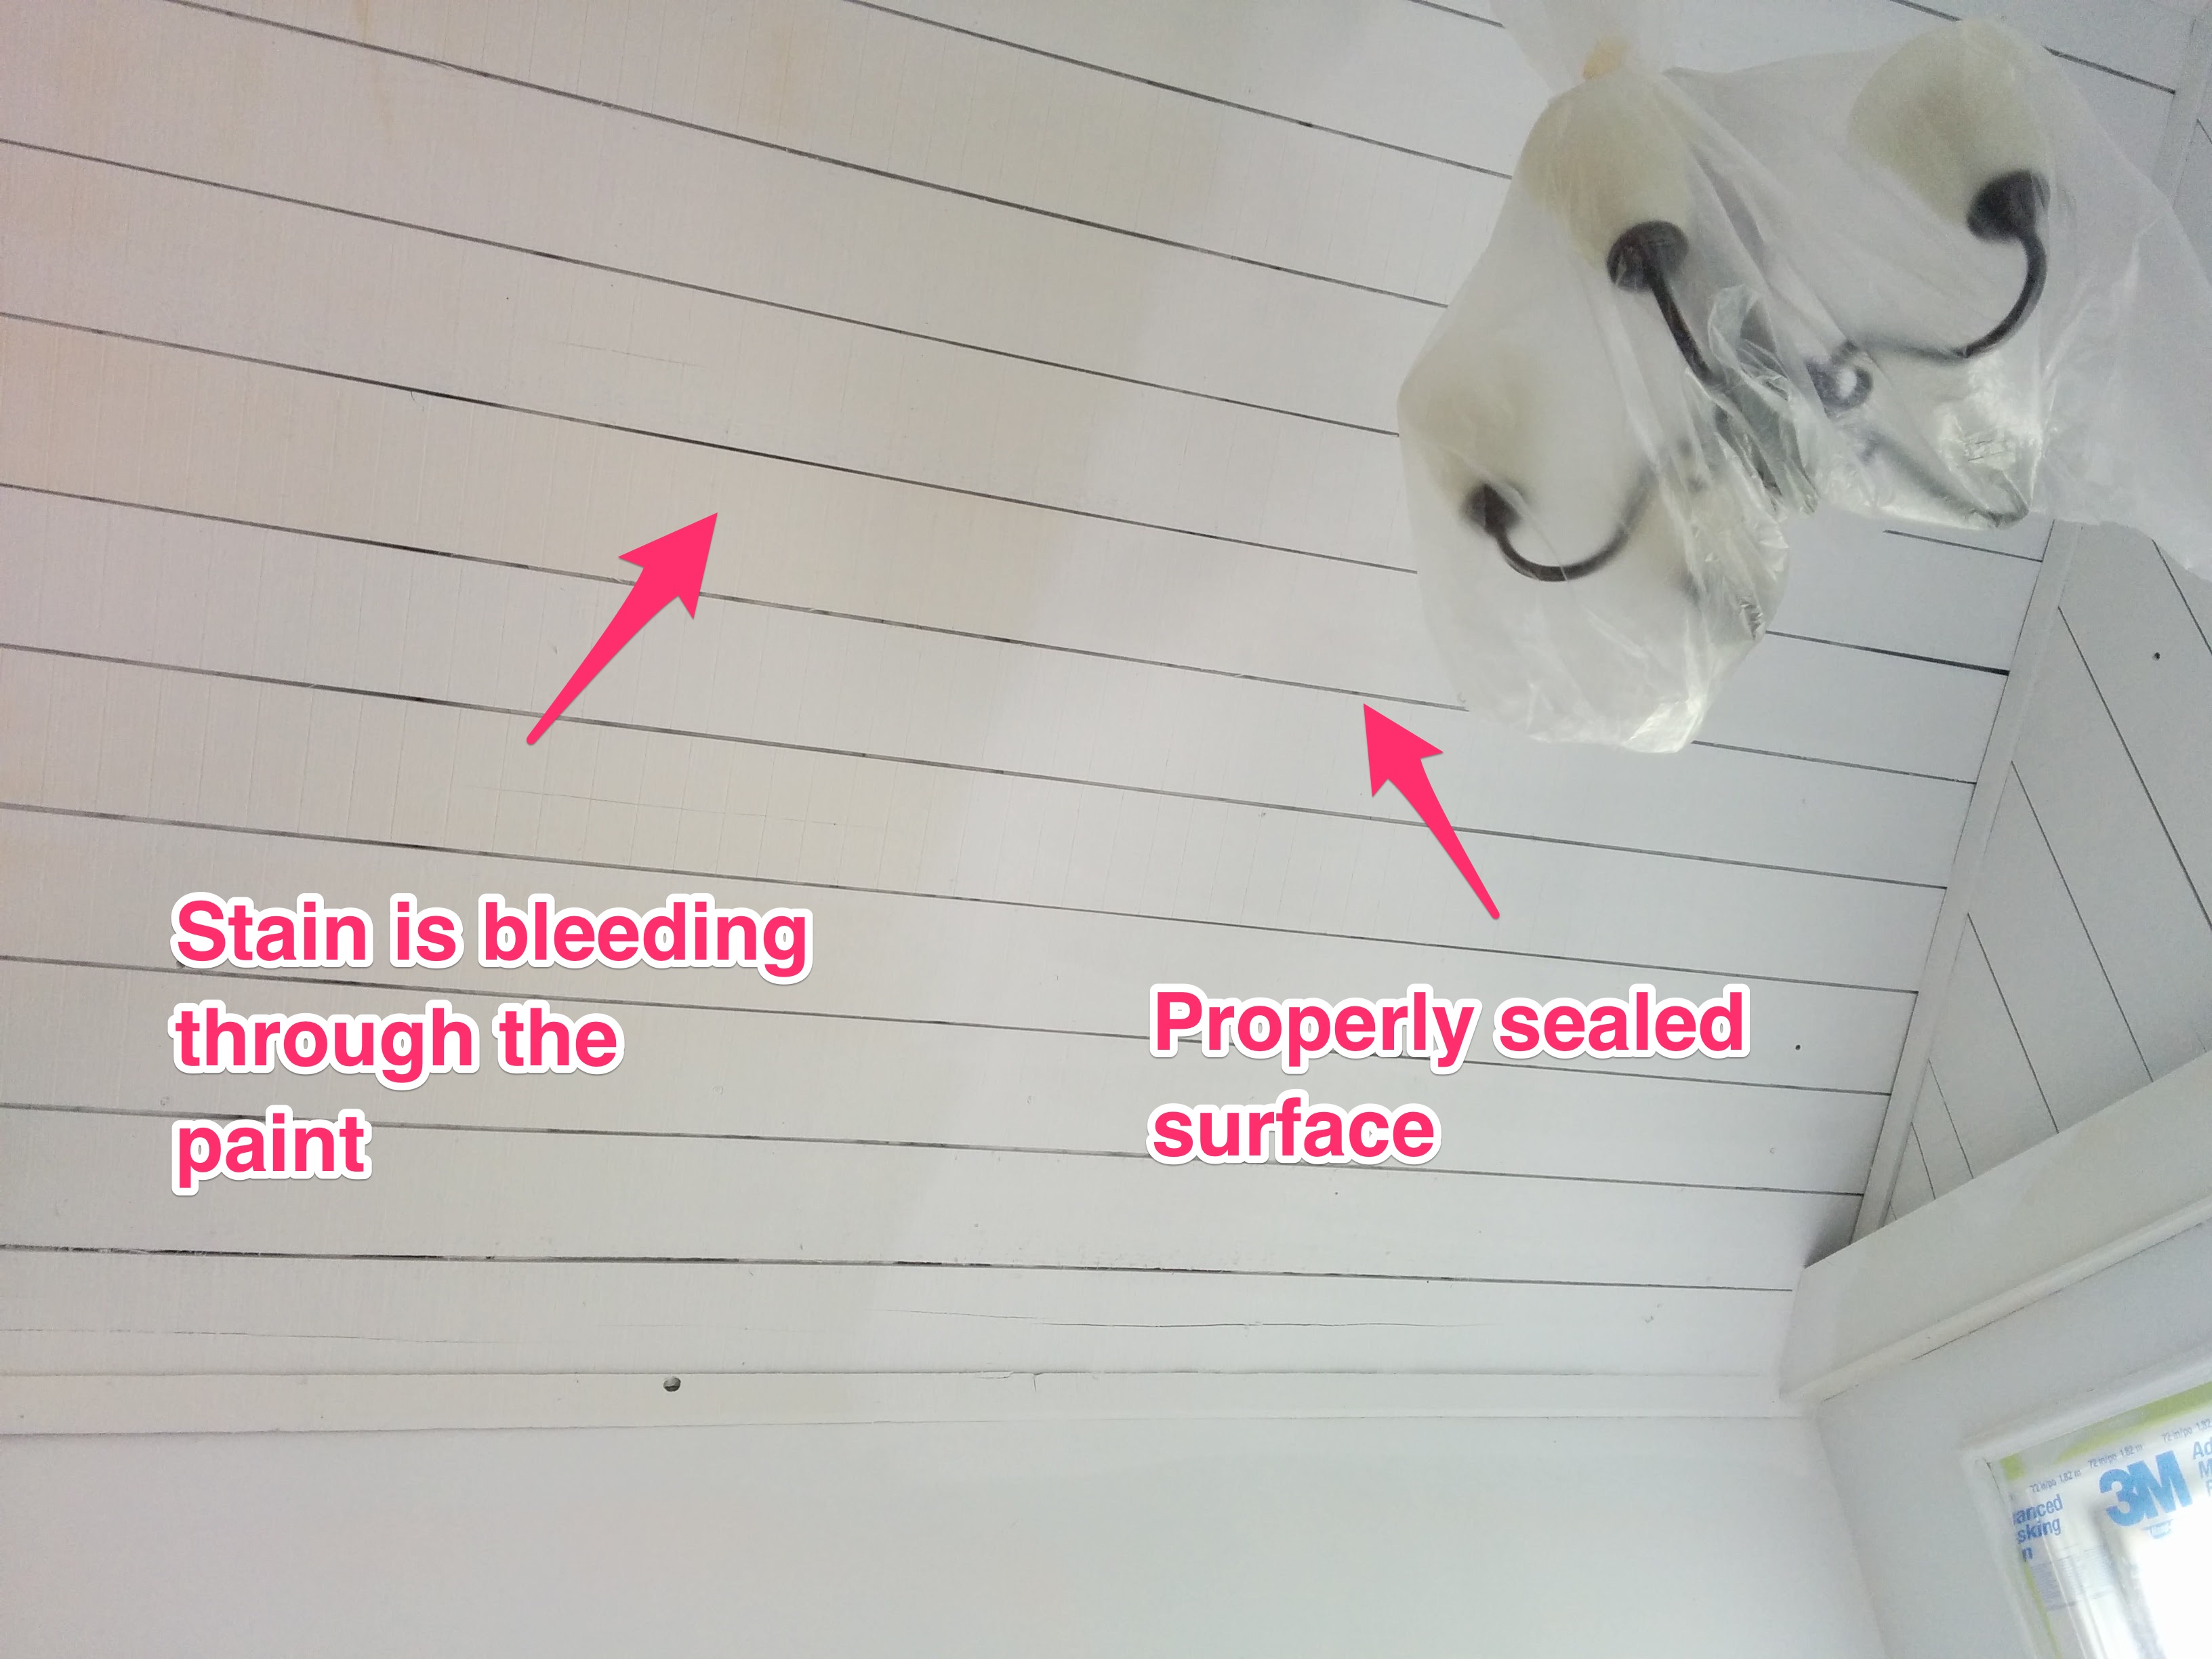
Stain bleed-through
READ: Interior Painting: How Much Will it Cost for My Toronto Home?
So now you have a basic understanding of the steps that need to be taken to paint varnished or stained wood.
If you’d rather have us come in and do the painting for you, why don’t you schedule a quote? We’d be happy to transform your home with lasting beauty!
by Craig | Sep 26, 2016 | Interior Painting, Pricing/Value
Many people are interested in how much their painting project will cost, even before having a painting contractor over to give them a written proposal. Below you will find typical sized rooms for Toronto homes so that you can get an idea of how much your interior painting project will cost.
READ: How Much Does it Cost to Paint My Interior In Toronto?
Interior painting costs (excluding prep)
Prices include both Labour and Top-Line Sherwin Williams Paint
| Small Bathroom 6 x 6
with 8’ ceilings |
Wall surface 190 sq ft
Ceiling surface 36 sq ft
Door & Frame each side
Baseboard 24 lin ft |
$325.00
$95.00
$65.00
$45.00 |
| Small Room 10 x 12
with 8’ ceilings |
Wall surface 350 sq ft
Ceiling surface 120 sq ft
Door & Frame each side
Baseboard 44 lin ft |
$450.00
$115.00
$65.00
$65.00 |
| Medium Room 12 x 15
with 8’ ceilings |
Wall surface 430 sq ft
Ceiling surface 180 sq ft
Door & Frame each side
Baseboard 54 lin ft |
$550.00
$165.00
$65.00
$85.00 |
| Large Room 15 x 20
with 8’ ceilings |
Wall surface 560 sq ft
Ceiling surface 300 sq ft
Door & Frame each side
Baseboard 70 lin ft |
$675.00
$225.00
$65.00
$105.00 |
Additional Considerations When Interior Painting
| All Wall Surfaces are figured for 8′ high flat ceilings. |
|
|
| If you have 10′ high ceilings then add 25% to both wall and ceiling prices. |
|
|
| If you have 12′ high ceilings then add 50% to both wall and ceiling prices. |
|
|
If you have 14′ high ceilings then add 75% to both wall and ceiling prices.
If you have previously painted popcorn ceilings then add 50% to the ceiling price.If you have unpainted popcorn ceilings then a double the ceiling price.To find out the difference between painted and unpainted popcorn ceilings click here
Interior Painting Prep Costs
| Minimal Prep:
Area sand to the walls
Less than 10 nail holes to fill
No cracks or holes to fill |
$45.00 per room |
| Crack filling:
2’ long crack
5’ long crack
10’ long crack |
$25.00 per crack$45.00 per crack
$65.00 per crack |
| Hole patching:
1’ x 1’ drywall patch
3’ x 3’ drywall patch |
$90.00 each$150.00 each |
| Skim coats:
5’ x 5’ area
8’ x 10’ area |
$200.00$300.00 |
|
|
|
READ: What Do I Need To Do To Prepare My Toronto Home For Interior Painting?
Final Thoughts on Interior Painting

I can’t cover all scenarios in this post, so I thought I’d cover the most common areas in the home and the most common prep work that we come across. It would be my pleasure to give you a quote, I can be scheduled online!
by Craig | Sep 21, 2016 | Interior Painting
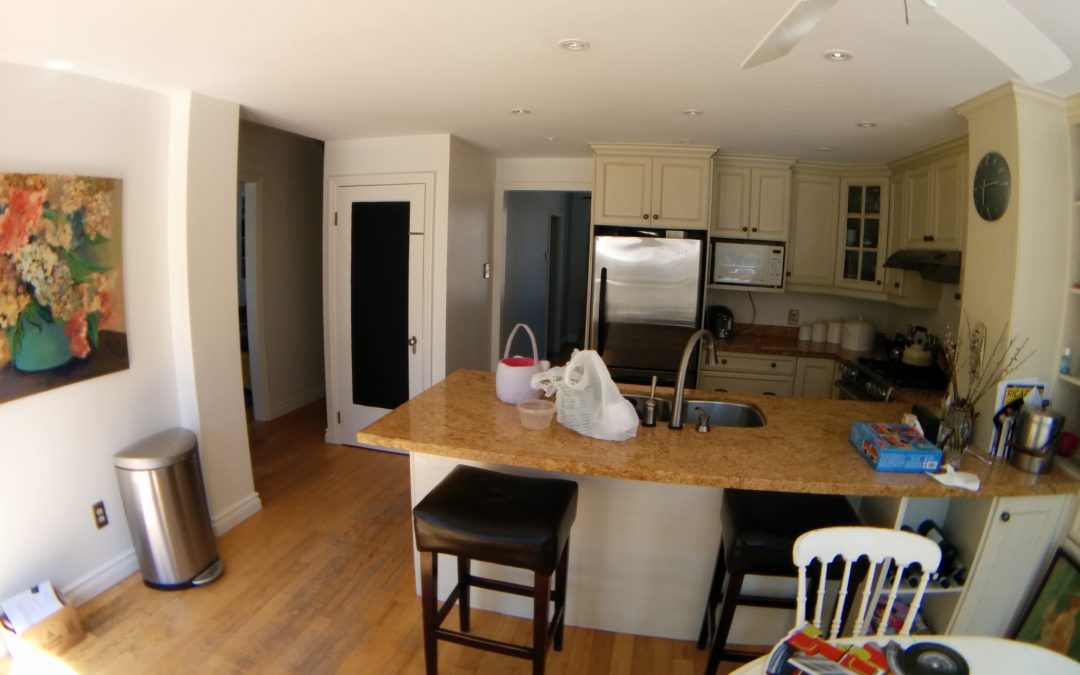
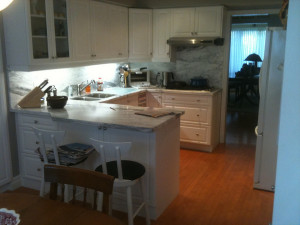
Many people are looking to update the look of their kitchen, whether that means just buying granite countertops or just adding some new furniture it seems to be the thing everyone is doing recently. The cost of a full kitchen renovation can be quite expensive, but just making a few small changes can make such a big difference. If you choose to renovate your kitchen, you’ll have to decide which color scheme and style to go for, as well as getting a dumpster rental in Aurora (or a company local to your home) for all of the rubble and old cabinets. If your kitchen is really outdated, a renovation may be needed but if not, a fresh lick of paint should do the trick! Also, if you can’t afford to renovate the whole kitchen, you could always change some of the kitchen’s features. Making sure that before you begin renovating that you have checked the electrics and plumbing are all working efficiently. We personally had to get our drains hydro jetted to clear out all the limescale and dirt clogging them and used a service similar to that on this website dependablerootersac.com/hydro-jetting/. In terms of small features, you could change the handles on the doors, update your faucet with an Anzzi faucet, or if your kitchen cabinets are in good shape, why not paint them instead?
In this post, I’ll go through the different paints that can be used for kitchen cabinets, and the pros and cons of each. Finally, I’ll go through the process that we use to transform your kitchen with lasting beauty!

First, a hybrid emulsion paint can be used.
These paints consist of oil paint suspended in a water-based solvent. They really are the best of both worlds, you get water cleanup, but when the paint dries, it has all of the oil properties. These paints dry fairly quickly and with a hardness that rivals oil paints. Sherwin Williams hybrid product is called ProClassic, Benjamin Moore has a hybrid product called Advance and a new product specifically for cabinets called Cabinet Coat.
These products are great for when kitchen cabinets have to be painted on site in an occupied house. Also, a fairly handy do-it-yourselfer could tackle this project too.
READ: Can my Toronto Painting Project be Completed in One Day?
Some words of caution, though; proper and thorough prep must be done to ensure that these products adhere properly and provide some durability. I recommend sanding the cabinets and putting a high bond primer, such as Sherwin Williams Extreme Bond Primer or Benjamin Moore’s Stix Primer.
Unless a sprayer is used, there will be some slight brush and roller marks. Although the durability of hybrid paints is good, kitchens tend to take a lot of abuse; doors and drawers are constantly opening and closing and painted surfaces are rubbing and making contact with other surfaces. The overall result is that the kitchen starts to show wear marks because the hybrid paint is just not as durable as a factory applied finish.
The next paint that can be used on cabinets is an oil paint.
The advantage of an oil paint is that it is more durable than its hybrid counterpart. However, some of the cons of oil paint make it less appealing than the hybrids:
- Oil paint is higher in VOCs, therefore it’s smell usually bothers people to the point that it’s uncomfortable to live in the house while the work is going on.
- Also, it has a long dry time, usually upwards of 8 hours between coats.
READ: How Do I Know if The Paint in My Toronto Home is Oil or Latex?
Finally, we have lacquer based paint.
These paints are what is used to finish cabinets at the factory. They are quick drying, extremely durable and are ideal for kitchen cabinets.
However, these paints must be sprayed and they are very smelly. They really aren’t the best choice for on-site refinishing.
How does CAM Painters transform kitchen cabinets?
We want the best of both worlds. To provide the most durable finish we take the doors and drawer fronts off site to be sprayed with lacquer, therefore, the parts of the cabinets that get the most wear get the most durable finish. We then match the colour in a hybrid paint and prep, prime and finish the exterior of the boxes. Once the doors and drawer fronts are done, we bring them back and reinstall them.
READ: How I Ensure That You Have a Great Painting Experience
So, if you’re wanting a beautiful and durable finish for your kitchen cabinets, book a quote, we’d love to transform your kitchen with lasting beauty!
by Craig | Sep 14, 2016 | Exterior Painting, Interior Painting
Most people value quick and efficient service. Their oil is changed in 15 minutes, their pizza is at their door within 30 minutes. Can the same thing be applied to painting services? Let’s find out…
What can be accomplished in a day of painting?
There are many new products coming out with shorter dry times, which allow us to complete more of your project in a shorter time. I’ll give a few examples:
Quick dry caulking: This particular product can be painted within a half hour versus over an hour with most other types of caulk.
READ: How-To: Get a Straight Line of Caulking
Sheetrock 5 or EasySand 5: These are powder based patching compounds which are designed to be fast drying. In fact, as long as a patch is fairly shallow it can be sanded within an hour. This allows us to do multiple skim coats on a patch in one day. Previously the quickest drying powder was Sheetrock 20, where a skim coat would generally take a half day to dry.
Quick dry primers: Many times we’ll use quick dry primers that can be top coated within 30 min to an hour. This gives us the ability to prime and paint in the same day.
However, we transform your home with lasting beauty, and sometimes it takes a little more time to achieve a lasting result. So, what are the circumstances that would prevent painting from being done in one day?
High level of prep needed before painting.
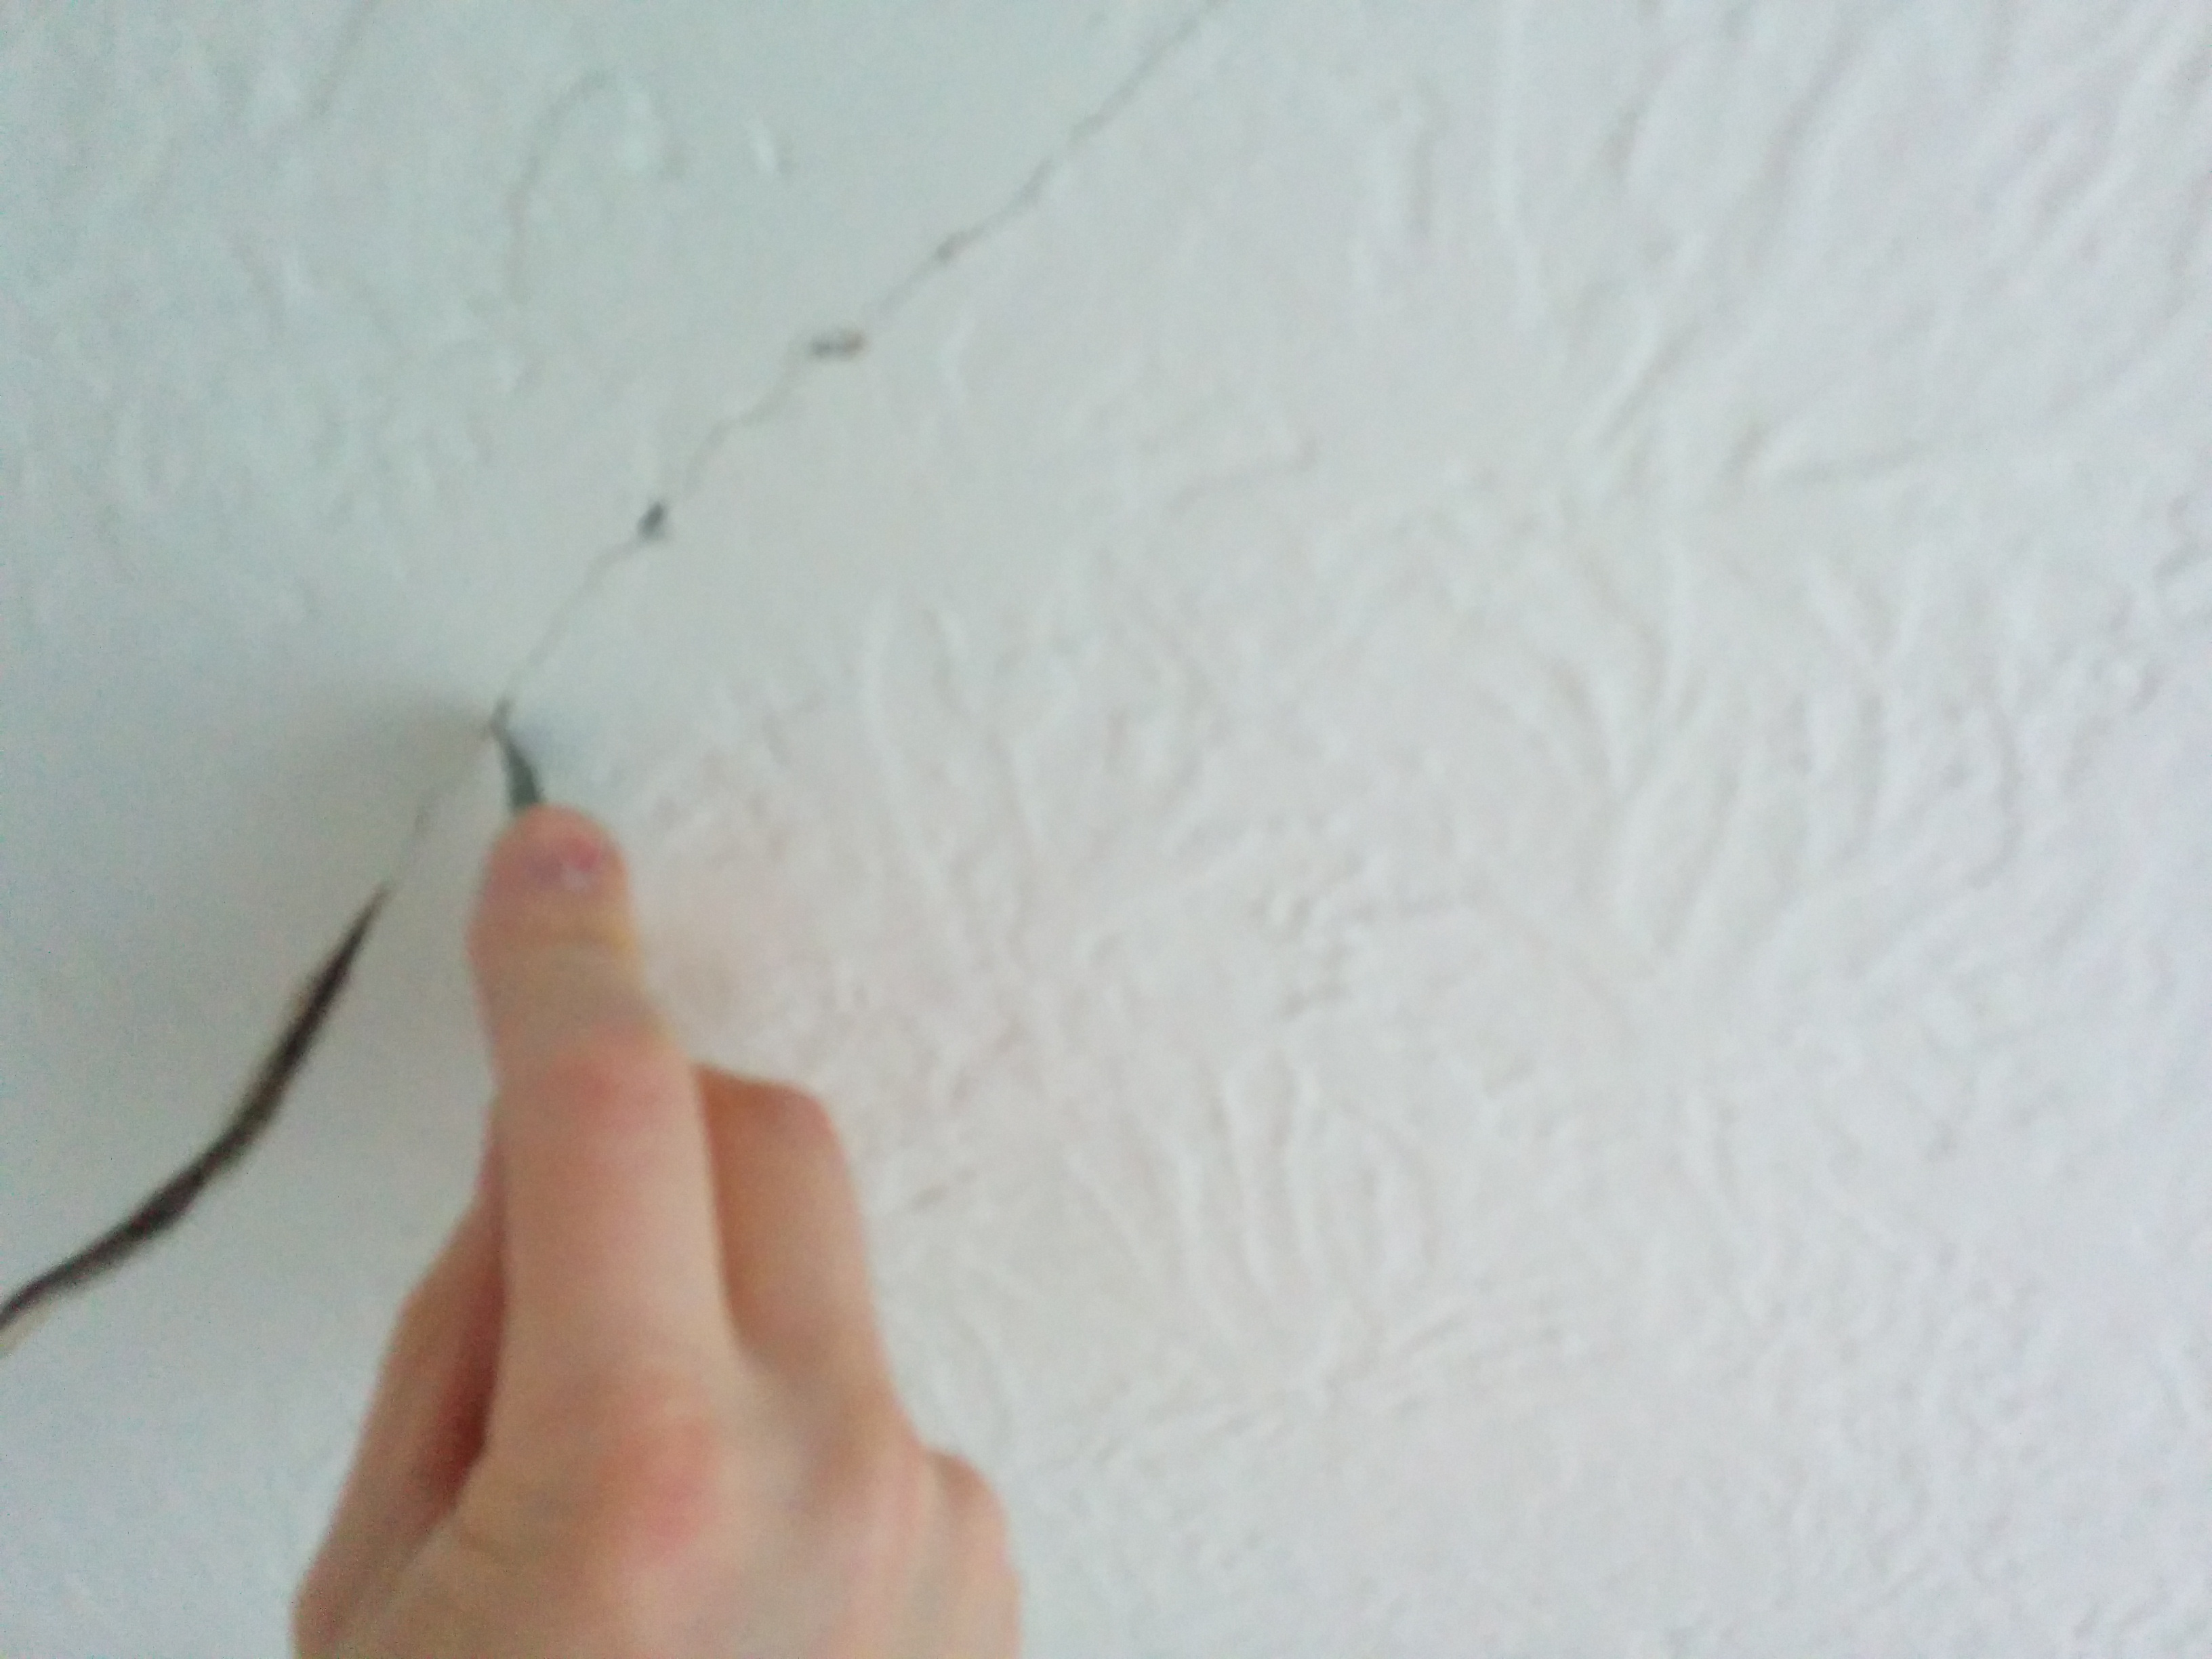
We work on many older homes in the city and it’s very common to see cracks in plaster walls, deep holes, and other damage.
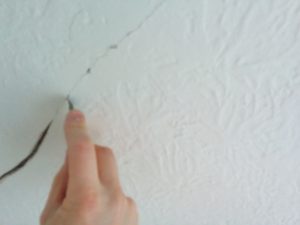
Some painters looking to quickly finish the job will just skim over cracks in plaster, however, this is only a temporary cosmetic solution. The crack is still lurking underneath the quick fix and it generally shows through the surface again, not long after the work has been completed.
In order to properly correct these fault lines in your walls, they must be dug out and widened before a thick layer of plaster compound is put in to stabilize the crack.
Whenever a thick layer of plaster compound is applied it generally needs to be left until the next day before it is dry enough to sand.
Likewise, when dealing with deep holes or other damage we have to wait for the plaster compound to dry, which generally means leaving it to the next day.
Also, when dealing with drywall walls, damaged seams generally take over a day to fix when the dry time is factored in.
Painting in humid areas and other factors that affect drying time.
In the summer, if there is a lot of humidity in the air the paint won’t dry as quickly and extra time will have to be factored in. This additional time can be reduced by running the air conditioning or a dehumidifier. If you do not have an air conditioner within the home, you may want to see about having an installation done by taking a look at company websites such as aqualityhvac.org/air-conditioning/ac-installation/ for guidance.
In the winter some exterior walls can be very cold, especially in older Toronto homes with poor insulation. These cold walls can greatly slow down the drying of both plaster compound and paint.
What can be done to speed drying times when painting?
Many times if plaster or paint is taking a long time to dry a painter will use a fan, heater, hair dryer or even a heat gun to speed the drying process. Whilst heat guns, that you can get from places like Pro-Tect Plastics (https://shrinkwrapcontainments.com/p-34-shrinkfast-998-ul-heat-gun-kit.aspx) can be particularly useful, ensuring that you use them properly, as well as controlling the temperature will be crucial in the success of the drying process. These techniques are fine, and we use some of these methods from time to time, but with caution. If dry time is accelerated too much what happens is that the top layer of either patch or paint dries, but underneath is still wet. The wet patch or paint will actually cause cracking and blistering in the future because the surface underneath is unstable.
READ: How I Ensure That You Have A Great Painting Experience
 So, in conclusion, CAM Painters can get a lot of painting done in a day, but there are many situations where we will need to give patching compound, primer or paint adequate time to dry so that it provides a sound, durable paint system for you, our valued client. In these situations, we prefer to do things right, rather than do things quickly.
So why don’t you book a quote? CAM Painters will Transform your home with lasting beauty!
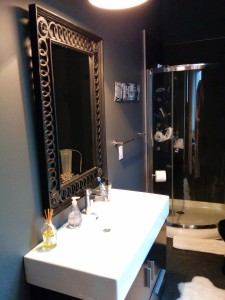
by Craig | Aug 29, 2016 | Interior Painting
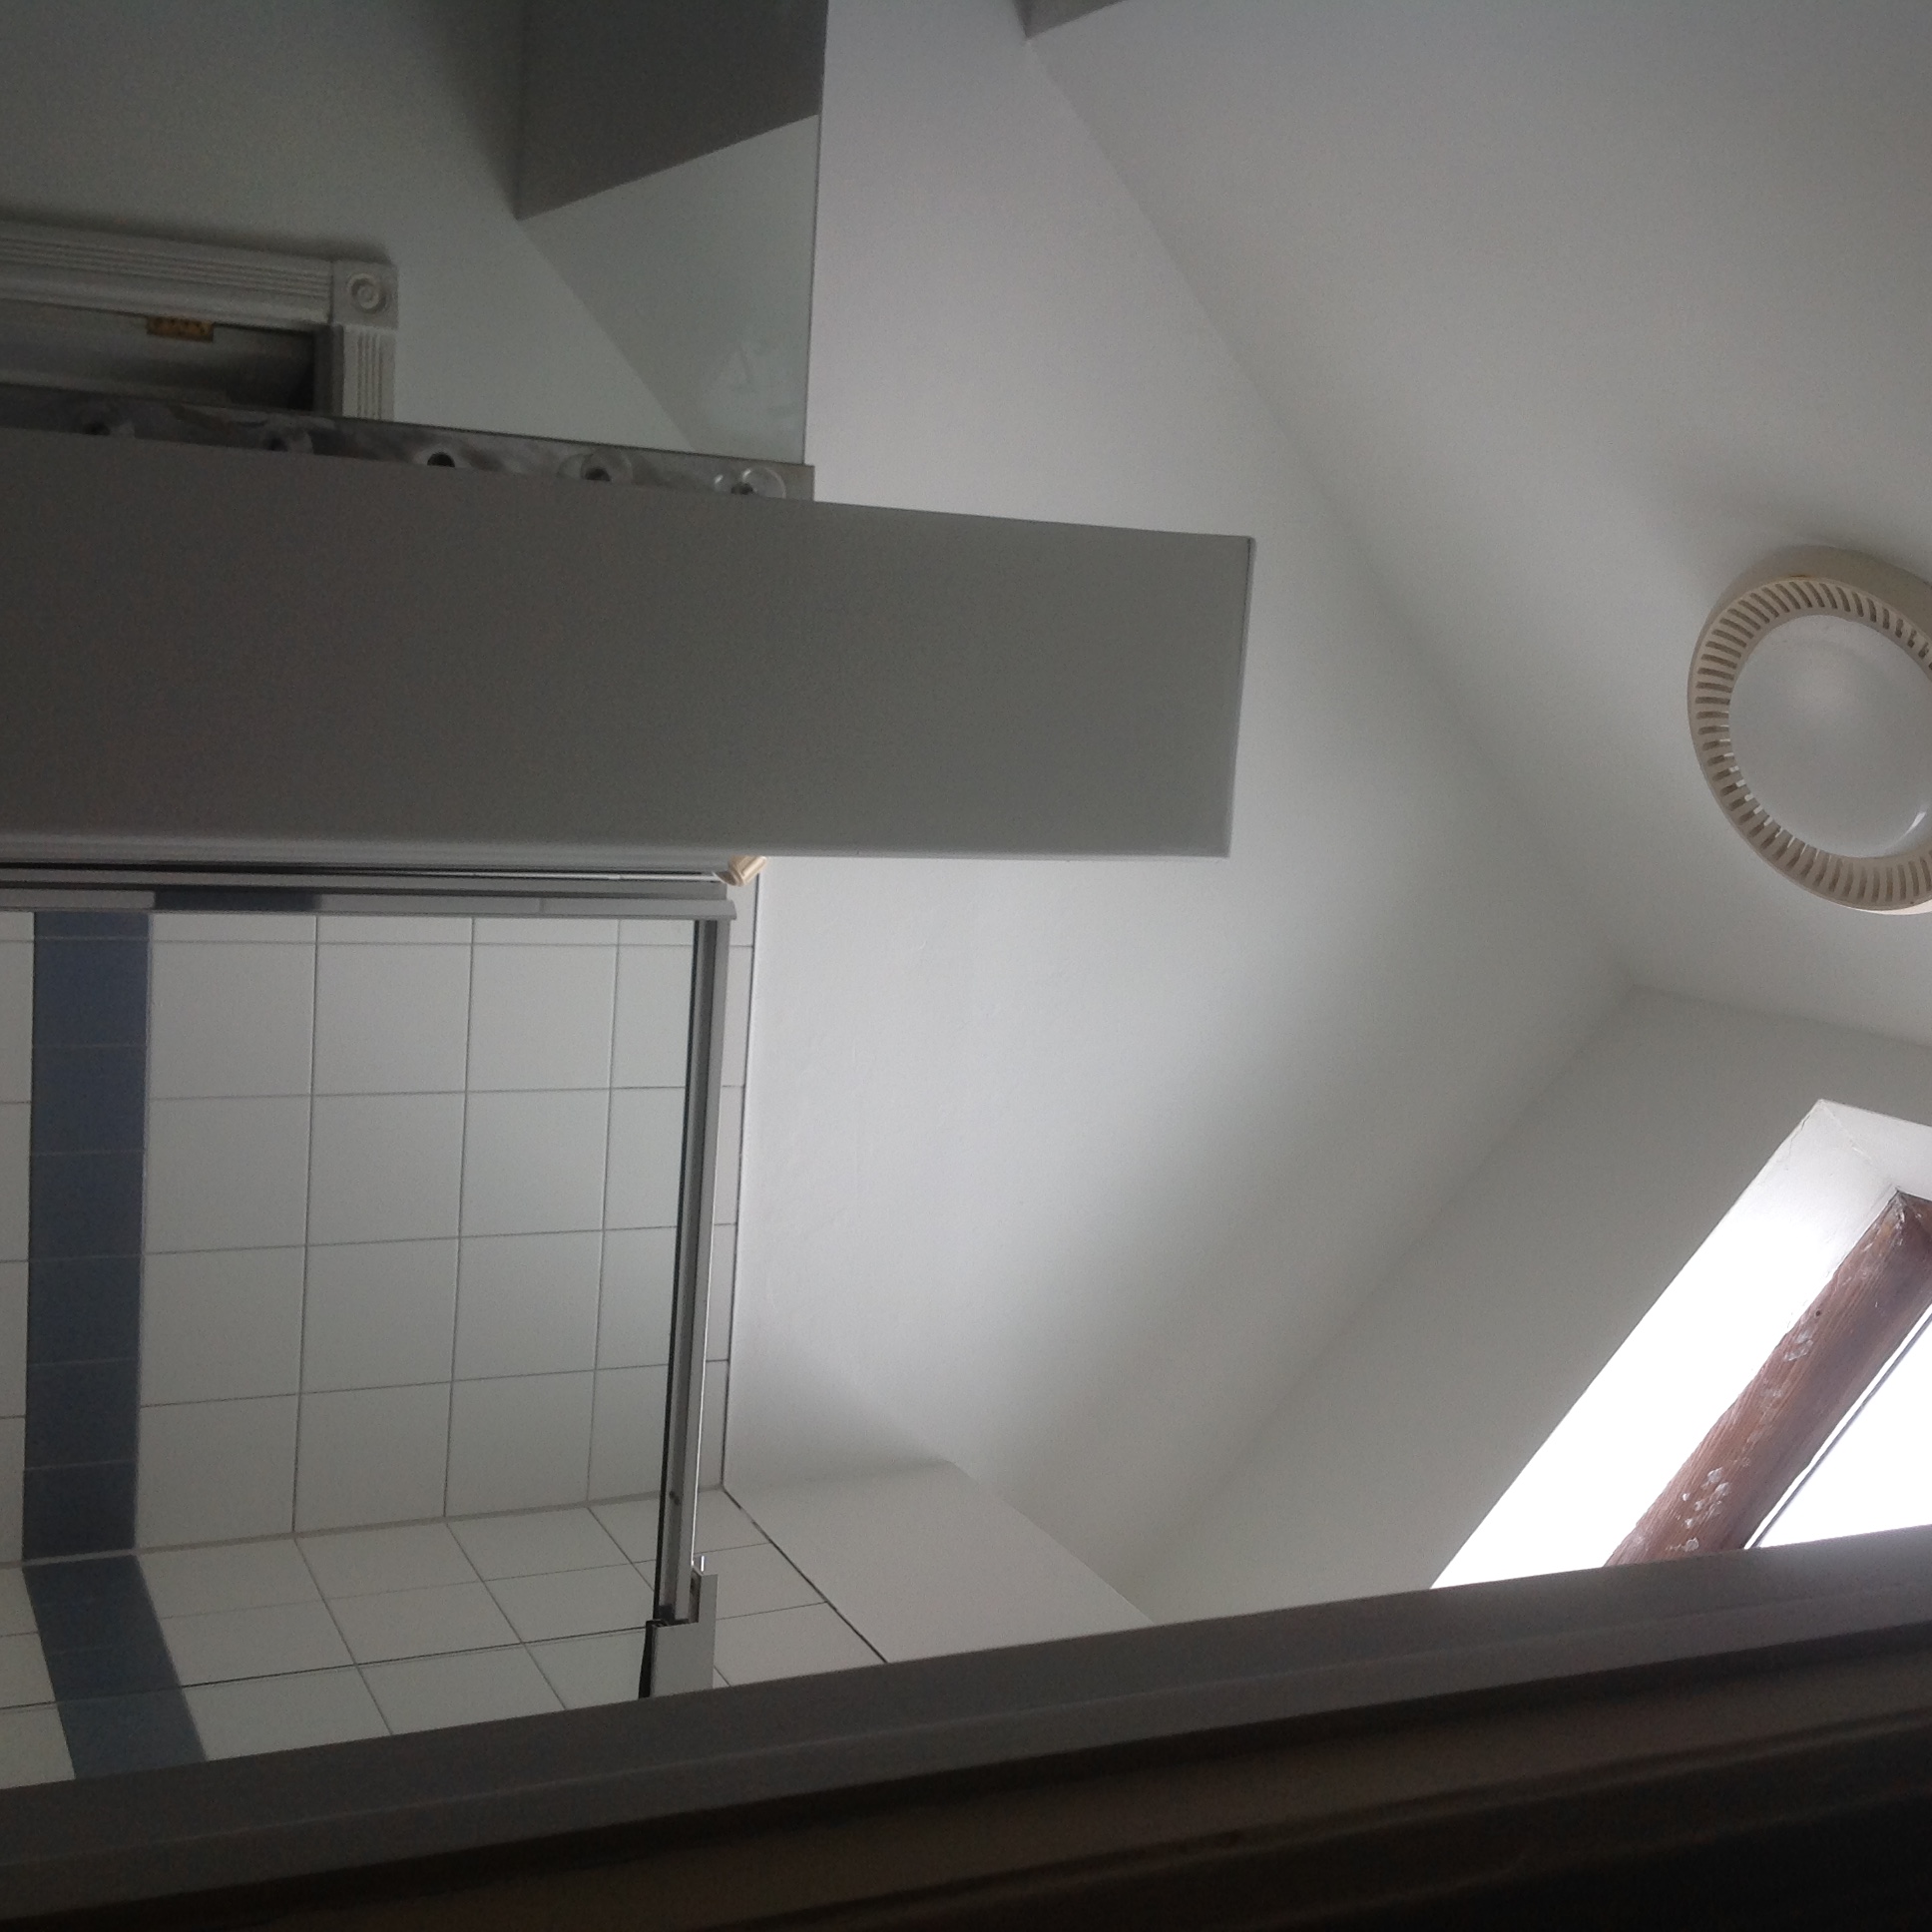
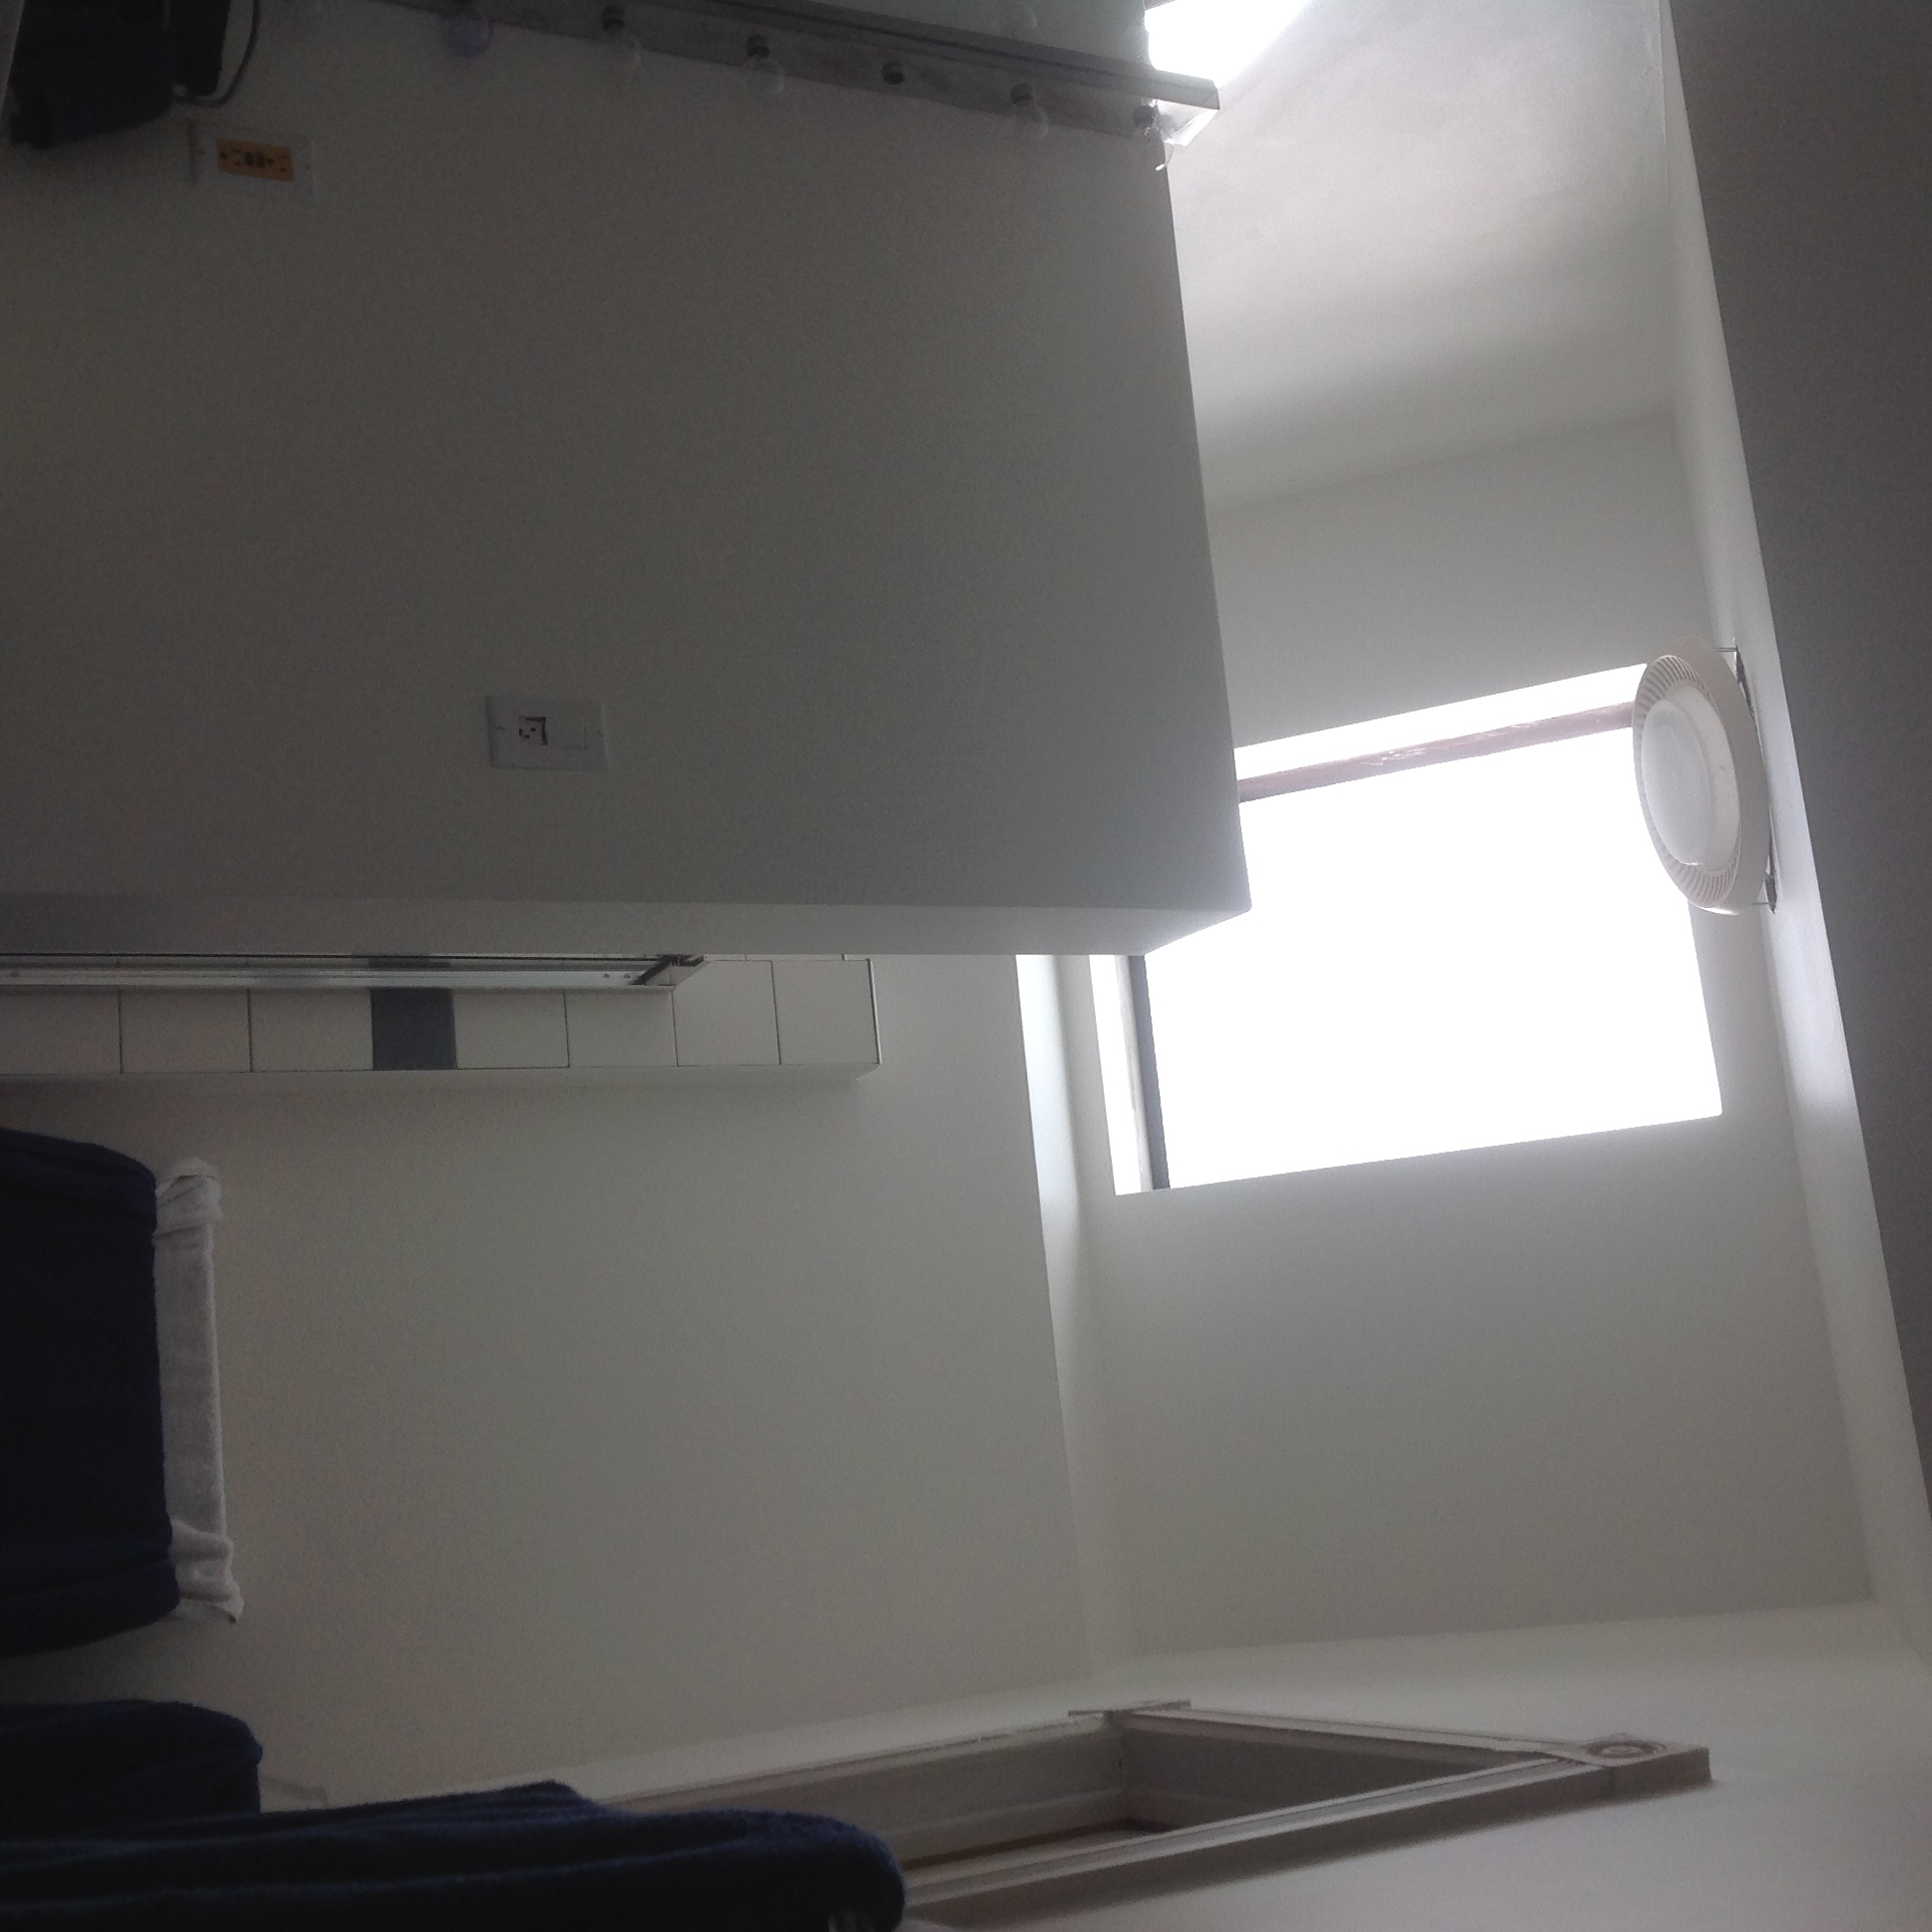
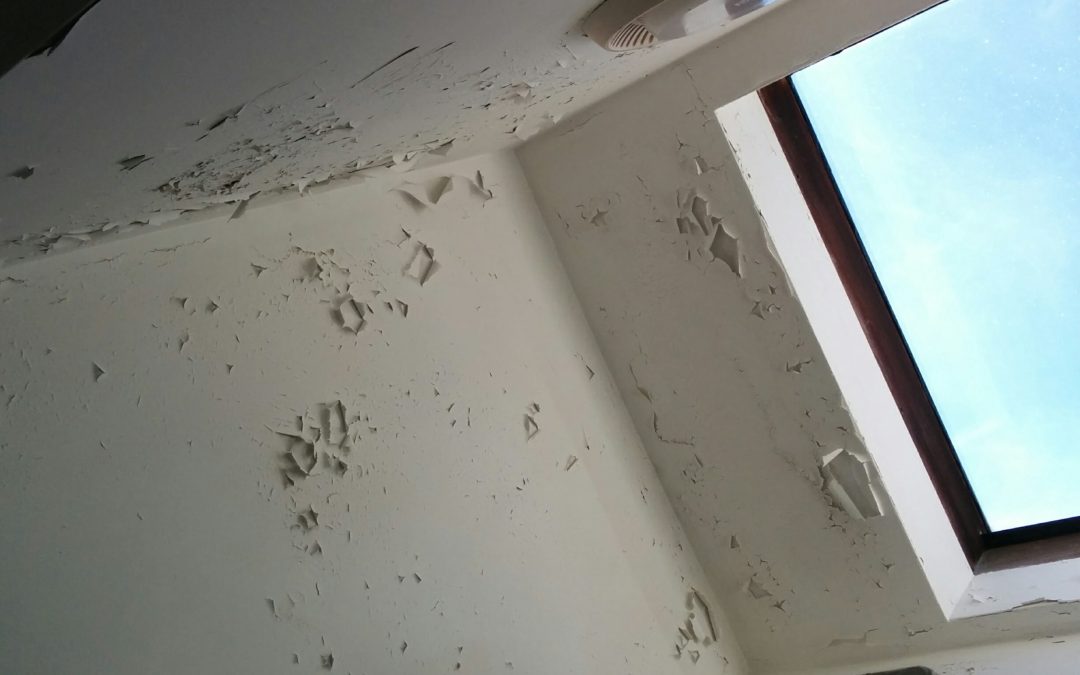
Bathrooms need special attention when prepping and painting. The moisture present in a bathroom can compound any improper prep work or poor quality products. This post is a word of caution about painting latex over oil-based paint without proper preparation….
Painting Your Bathroom Tip: Tissue Peeling
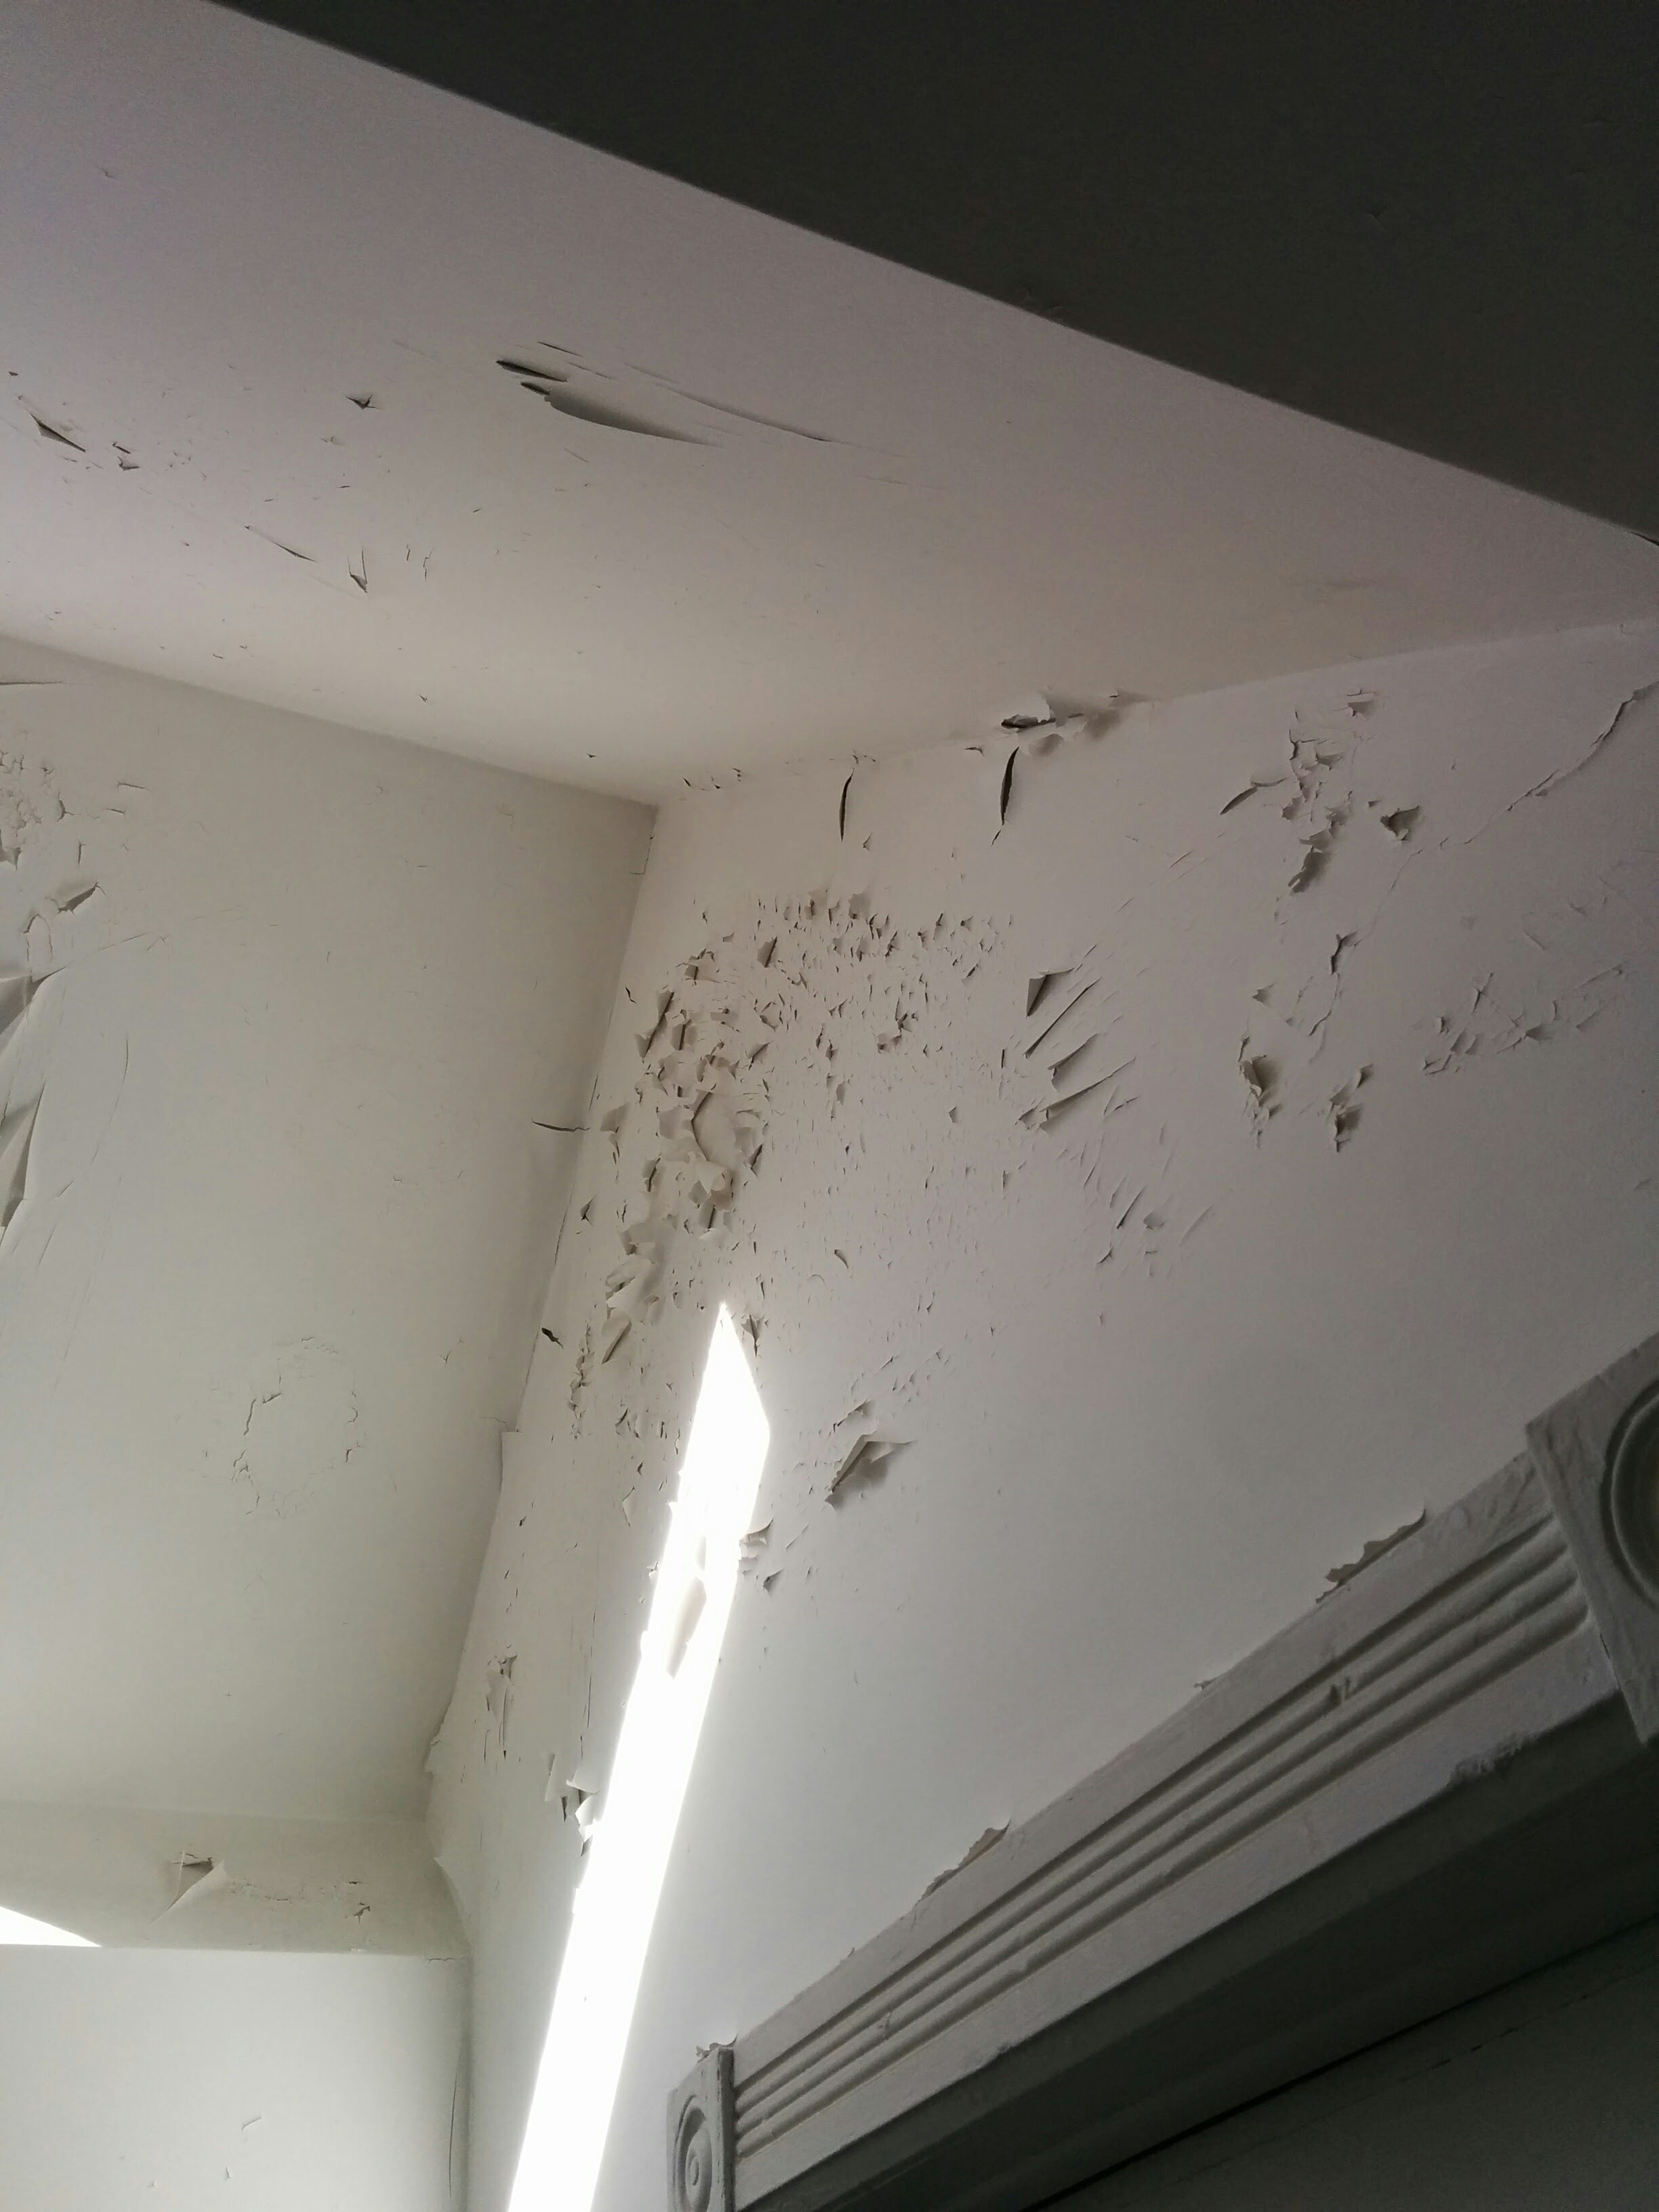
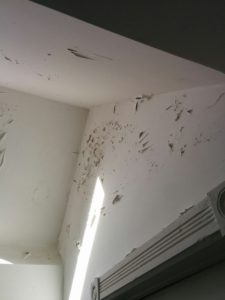 I’d like to take you through a recent project that we did for a client who lives in an older home in downtown Toronto. She had tissue peeling, where the top layer of paint does not adhere to what was underneath.
Upon inspection, we discovered that latex paint was used over the top of old oil-based paint without proper preparation. The gloss of the oil paint was not allowing the latex topcoat to bite into the surface. Even as recently as 10 years ago it was common for oil-based paint to be used in bathrooms, so a careful inspection must be done before starting the painting project.
READ: How Do I Know If the Paint in My Toronto Home is Oil or Latex
The previous painter should have sanded and primed the old paint before putting a latex paint on top. However, due to the painter’s ignorance or negligence we have the paint failure that you see here.
Painting Your Bathroom Tip: How to Fix Paint Failure
Before you start redecorating, make sure you have checked all of your pipes to ensure they are not leaking or faulty. Water damage may be the reason your paint is peeling, so it’s a good idea to hire quality plumbing services in Milford or wherever you are to get all of your pipes checked and replaced if needed. Otherwise, your brand new paint job will have been an exercise in futility.
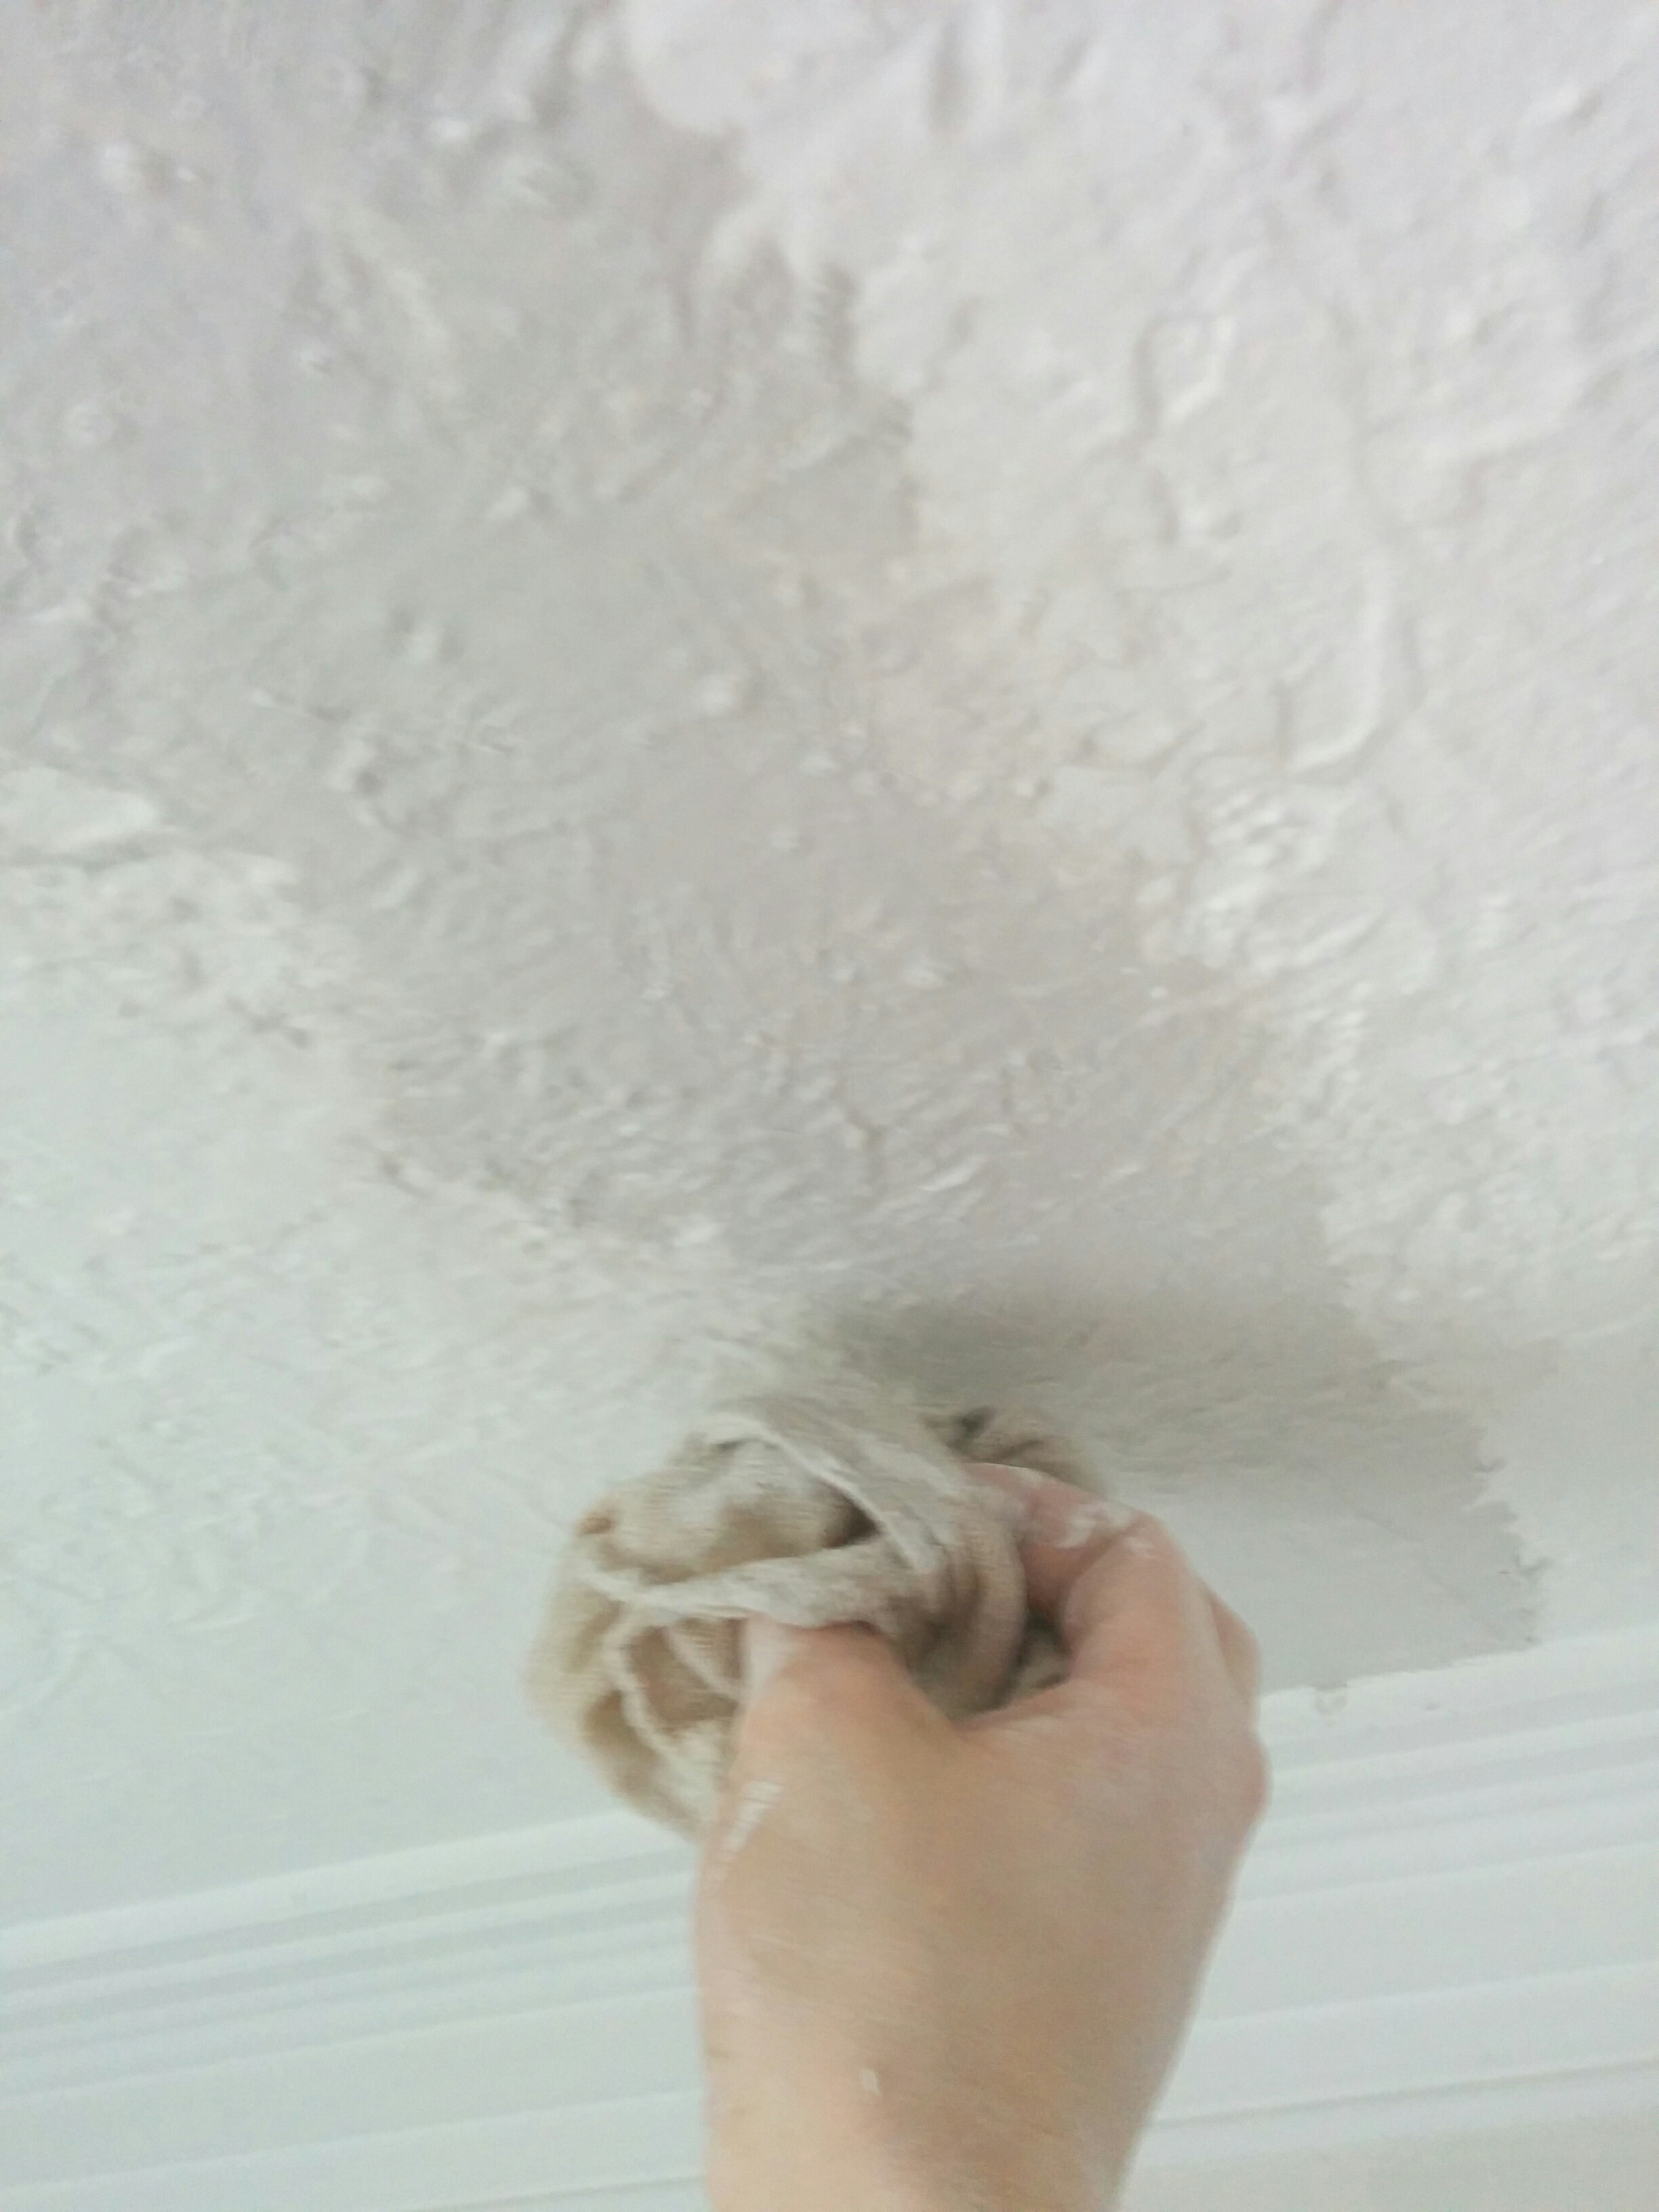
- We had to remove all the peeling and flaking paint. So we basically scraped and sanded every square inch of the surface to make sure what was left wouldn’t cause peeling in the future. This gave us a sound, stable surface to work with.
- We primed the surface using a primer designed to adhere to old oil-based paint. This was to create a surface where anything we put on top would be able to bite into the surface.
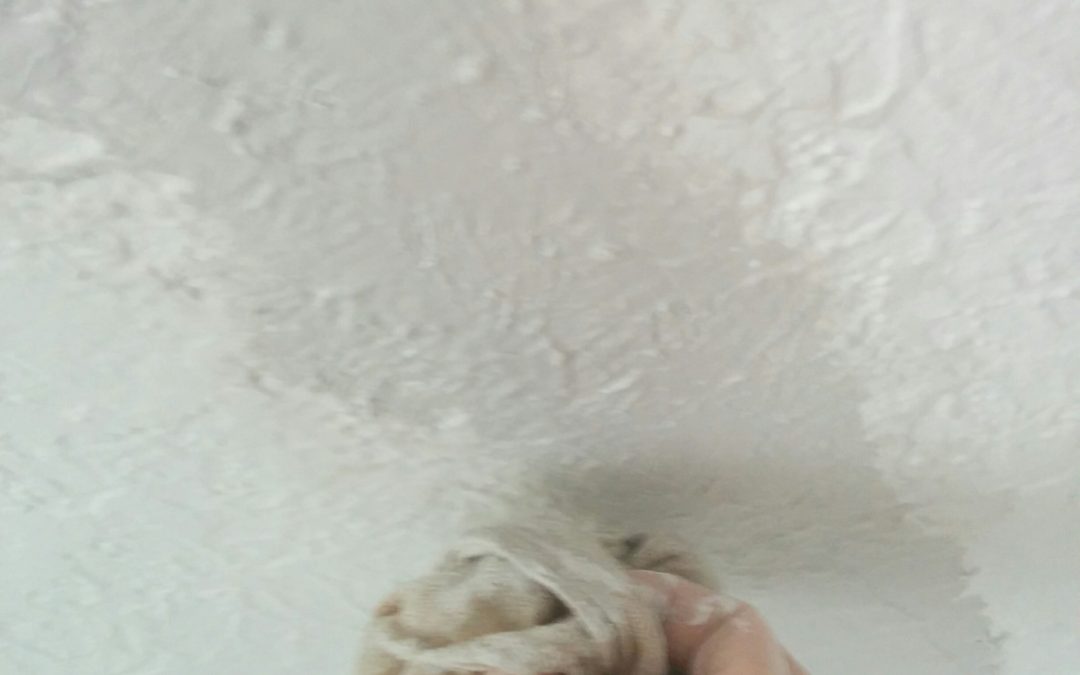
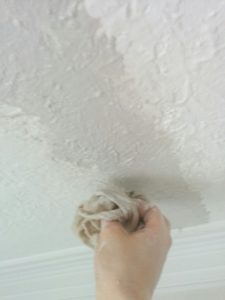
- We skim coated the area to make sure that all the ridges from the peeling paint were smoothed out. A skim coat is a thin layer of plaster over the entire surface, it ensures that the surface is smooth and level.
- We sanded and wiped down the surface. Sanding creates a lot of dust and this dust should be wiped off the walls before priming and painting.
- We primed the walls a second time. Many paints boast that they are paint & primer in one, however, in this case, proper adhesion is key and it is much safer to prime over bare patch before applying the finish coat.
- We did final plaster touch ups to the walls. Once the walls are primed some minor flaws that couldn’t be seen before are revealed, so we go around with plaster and touch those spots up.
- We spot prime our plaster touch ups.
- Finally, we paint the surface. We used 2 coats of high-quality Sherwin Williams Emerald paint. This paint is mould and mildew resistant, so it’s a great choice for a bathroom or a kitchen–anywhere moisture is an issue. After you’ve finished repainting maybe a change of bathroom decor could be refreshing as well. I hear new frameless shower doors revitalize a bathroom nicely.
As you can see, there were many extra steps that had to be taken because the work was not done properly in the first place.
READ: Why is Paint Peeling on the Interior Of My Toronto Home?
Whether your paint is failing currently, or you’d just like to ensure that the work is done properly in the first place, why don’t you book a quote? We’d be happy to Transform your home with lasting beauty!