by Craig | Aug 14, 2016 | DIY, Interior Painting
 A common question I am asked from my Toronto home painting clients is, “What’s the best brush and roller to use for a painting project?” It really depends on what you’re painting and the finish you want to achieve.
Last post I talked about brushes, this post let’s talk about rollers.
In order to know what is best let’s talk about what you’re planning on painting.
Ceilings and Walls – roller for no texture
These are wide-open spaces that you want to cover as evenly and efficiently as possible. Typically we use a 9″ roller, however, if we’ve got a lot of the same colour to roll out (ie. a big room or multiple rooms of the same colour) we’ll use a big 18″. The advantage of the 18″ is that paint is rolled out twice as quickly, without any sacrifice in the quality of the final product.
What about thickness? For flat walls and ceilings I generally use a 15mm roller, which is a medium thickness roller. If we go with a thinner roller we have to dip it in the paint too often, which is inefficient, or the paint ends up being too thin. If we go with too thick of a roller it puts too much paint on the walls which can result in drips and sags.
I really like microfibre rollers, I find that they produce the smoothest finish with the least amount of texture, or “orange peel”.
Pro tip: Even if a roller says that it’s lint free, it can still leave lint on the surface. To minimize this wet the roller with water and give it a spin with a roller spinner before using. This will take off any loose fibres, so they don’t end up on your freshly painted walls.
READ: How to Have a Great Painting Experience
Ceilings and walls – roller for textured surface
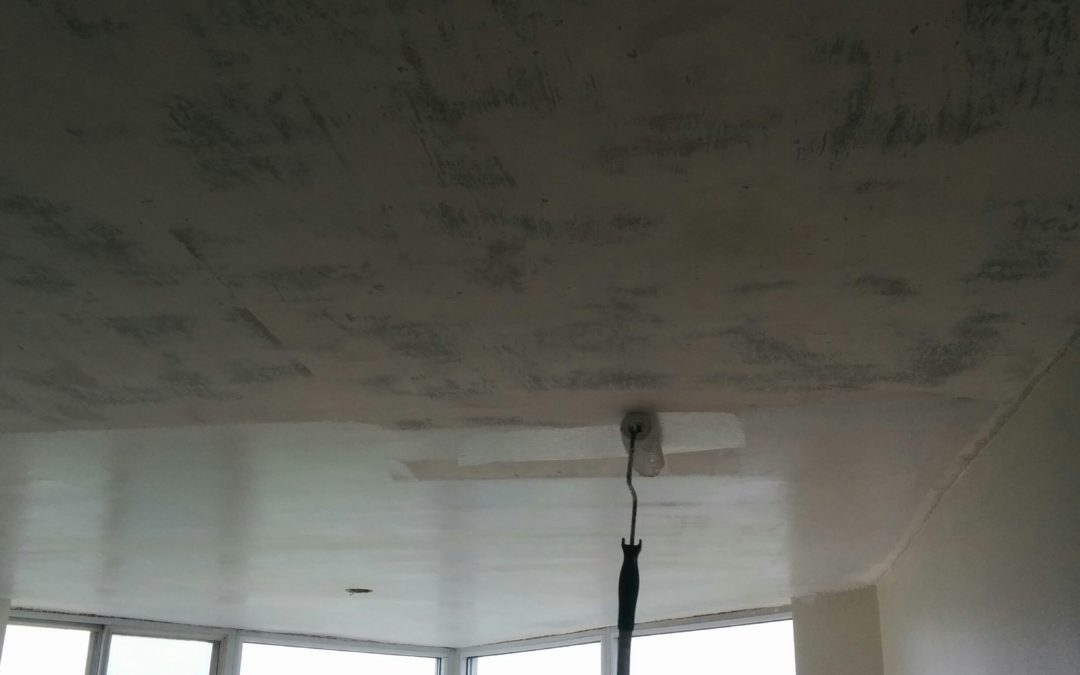
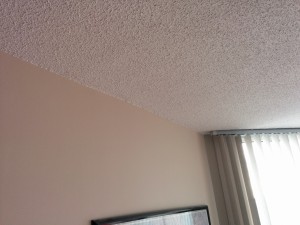
Many ceilings in Toronto homes have stucco or popcorn texture. For these surfaces, I would use a thicker version, perhaps 20mm or even 25mm. More thickness is needed to get into all the nooks and crannies of the texture.
2 words of caution:
Popcorn ceilings give off a lot of spray and paint splatter, so be prepared for this and cover everything in the room. If it’s not properly covered it will get paint on it. Also, you’ll get paint on the bottom of your shoes so be careful when exiting the room after painting!
Check to see if the popcorn ceiling has been painted before. If it is unpainted you will have to use alkyd paint. I’ve written a post on painting popcorn ceilings, click here.
READ: How much does it cost to paint my interior in Toronto?
Trim
Trim painting involves a lot of brush work, however, the process can be streamlined with the use of a mini roller. Also, a very smooth finish can be achieved with a mini-roller.
For doors, cabinets and other flat surfaces I use what’s called a flocked foam mini roller. It’s foam with a flocked covering on the outside. Foam lays paint out very flat, however, they can leave bubbles in the paint. With the flocked foam, the flock pops the bubbles, leaving the smooth surface with no bubbles!
To use a roller on trim, first, brush out what it won’t be able to reach and then roll the areas that are left. Always brush before rolling to ensure the smoothest end result.
If you’d like a quote on your next painting project feel free to book a quote online. We’d be happy to Transform your home with lasting beauty!
by Craig | Aug 7, 2016 | DIY, General posts
I often get asked by people who enjoy DIY projects, “what kind of brushes and rollers do you use?”
In this post, I’d like to talk about brush selection, and in a subsequent post I’ll talk about roller selection.
Quality is key.
A low quality brush will only give you frustration and slow the painting process down. How do we select a quality brush? Take the brush out of the package and place it against a wall with a little bit of pressure, as if you’re applying paint. If the bristles come to a nice point, that’s the sign of a good quality brush, you’ll be able to apply the paint in a nice clean cut line. If when you place the brush against a wall and the bristles are going many different directions – select another brush, or use it as a dust brush!
The type of brush is dictated by the task you are doing.
There are two main types of brushes; angle sash and straight sash.
Angle sash brushes are cut at an angle, so that the bristles come to a point. These brushes are good for all tasks, especially when cutting straight lines, for example, brushing the top edge of a wall, or painting a window.
Straight sash brushes are squared off at the bottom. These brushes are not as good at cutting a straight line as an angle sash. They are good, however, for painting clapboard siding and decks.
The size of the brush should be determined by the task that you are doing.
If you are painting walls, I’d recommend a 2.5″ or 3″ brush. These brushes will hold more paint so you will not have to be dipping your brush in the paint as often. This allows you to do longer, more even strokes, which will result in a better, smoother, finish.
 Most trim I use a 2″ to 2.5″ brush. This would include baseboards that are over 3″ (which most are these days), window and door casements, doors, etc.
If you are painting fine trim, such as a french door, you could opt for a smaller 1.5″ brush. This will ensure that you don’t get too much paint on the smaller surface. Too much paint on the surface and you will get drips and sags.
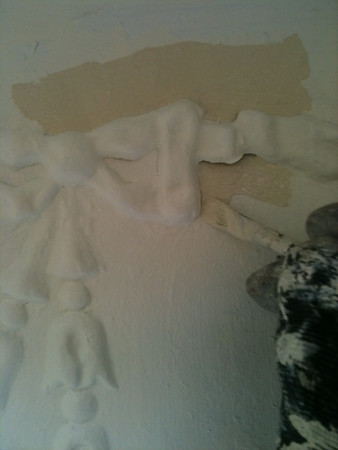
Sometimes there are times when an artist brush comes in handy. These are great for detail work! Here’s a tip to keep the brush steady while doing fine detail work; touch the surface with your pinky and ring finger while you hold the brush with your thumb, index and middle finger. The pinky and ring finger anchor your hand and minimize any hand shakiness.
What brands of brushes are good?
This is all a matter of personal preference, of course, but I’ll give a few suggestions to start you off. You can look for Purdy brushes, Wooster brushes, these are pricy brushes, but you get what you pay for, if you take care of them, they’ll last for a while. Other good brush brands are Piccaso (which can be found at some Benjamin Moore stores). If you’re looking for a more economical brush, Sherwin Williams has a contractor grade brush that has a lot of bang for the buck.
If you’re project is bigger, or more involved than you’d like to take on, please book a quote! We’d be happy to come over and give you a quote and help you Transform your home with lasting beauty!
by Craig | Feb 2, 2016 | DIY, General posts, Interior Painting

It’s important to know is the paint in your toronto home is oil or latex. In this post we’ll show you how to tell the difference.
First off, why is it important to know if my home is currently painted with oil or latex?
Oil paint generally dries harder and slicker than latex and latex paint has a hard time binding on to oil without proper preparation. If oil paint is present and proper preparation isn’t done the latex paint won’t adhere to the oil paint underneath – see picture
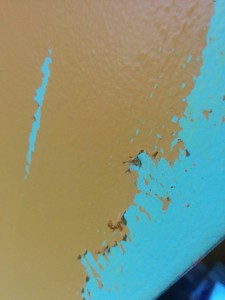
Latex paint over oil without proper preparation
How likely is it that I have oil paint in my home?
If your home was painted within the last 5 years there was likely no oil used. If it’s been over 10 years since your home was painted there are a couple of areas that could be painted oil:
- trim – doors, door frames, window frames, baseboard
- walls and possible ceilings in the kitchen and bathrooms
These are the places that I would check first. 10 years ago oil was a much more durable alternative than latex for these high traffic and high moisture areas. Recently, with advances in paint technology there are great latex paints that are more than suitable for these areas.
How do I tell if the paint on my walls and/or trim is oil?
Look at the paint closely:
if there are a lot of brush or roller marks it’s likely latex, oil looks more smooth than latex. Oil will also feel smoother to the touch than latex.
Use the acetone test:
Put some acetone or nail polish remover on a rag and rub it on the surface of the paint. If the paint comes off on the rag it’s latex paint, if the paint doesn’t come off on the rag it’s oil.
I think my paint is oil, what do I do now?
Proper preparation is key. There are 2 things that I’d do to ensure that the latex top coat will adhere to the oil paint:
If you’d prefer to have someone do your painting for you why don’t you book a quote? CAM Painters can Transform Your Home With Lasting Beauty!
by Craig | Jan 18, 2016 | DIY, General posts
 Homes are made to be lived in, as such the walls and trim can get marked up over time through normal wear and tear. If you have kept some leftover paint that’s a good thing, it makes it easier for your painter to touch those spots up.
How should I store my leftover paint?
Two things to keep in mind when storing leftover paint:
- Make sure the lid is sealed tightly. Air will dry out your paint and make it less usable over time, so make sure the lid is seated properly on the rim.
- Make sure you store your leftover paint inside. If paint is exposed to freezing temperatures the solids will separate from the solvent and it will be unusable. If you must store your paint in a shed, garage, or outside, bring it it before temperatures dip below zero. I have had paint spoil in as little as a half hour in sub zero temperatures.
How long can I store leftover paint?
Paint can be stored for at least 2 years and sometimes more. Oil, or Alkyd paint usually will last longer than latex paint, sometimes upwards of 10 years. Latex paint generally lasts 2 to 5 years.
To check and see if your paint is still good, simply open the lid, give it a stir with a paint stick and if it’s an even consistency without any lumps – keep it.
How do I dispose of leftover paint?
Wait! Before you dispose of any leftover paint be sure to take pictures of both the lid and the label. This will help your painter if you want any touch ups done in the future. From the pictures your painter can get a new can of paint that will match what you currently have on your walls or trim.
In Toronto, there are several transfer stations that offer Household Hazardous Waste (HHW) drop offs, or you can arrange a pick up of your leftover paint using the toxic taxi. Click here to find out more information about locations or to book a toxic taxi.
Do you have any touch ups that need to be done around your Toronto home?
CAM Painters can help, regardless of if you have leftover paint or not. Book an estimate today and CAM Painters will Transform your home with lasting beauty!

by Craig | Nov 30, 2015 | DIY, Interior Painting
Before you start to paint the stucco ceiling in your Toronto home STOP and read this post! You could save yourself some frustration.
The most important thing to figure out is whether the stucco has been previously painted or whether it’s bare.
Isn’t my ceiling painted already if it’s stucco? Not necessarily, stucco when it is initially applied is not sealed and stucco is water-soluble.
If latex paint is applied directly over bare stucco, the water content in the paint wets the stucco and makes it soft and heavy and it can cause the stucco to fall right off your ceiling!
How do I tell if my stucco is bare, or has been previously painted?
The first thing I would check is whether it powders up when it’s touched, if you have a powdery residue on your fingers after you touch the stucco, it’s bare stucco.
I’ve determined that I have bare stucco on my ceilings, how do I go about painting it?
You will have to use a flat sheen oil to paint your ceiling, in this case.
I’d recommend Zinsser Odourless, or something similar. Keep in mind, even though the product says “odourless” it still has a definite odour, so wear a respirator and make sure that young children and pets are not exposed to the fumes. You can buy a respirator from somewhere like www.sciquip.co.uk/products/ppe/ffp3-respirator-mask that will protect you from any harmful fumes.
Actually, my ceilings have been previously painted, how do I go about repainting them?
In this case you can use a flat sheen latex on your ceilings, just like if they were regular flat ceilings.
Regardless of whether the stucco ceiling is bare or previously painted keep in mind that you will get significantly more paint splatter and spray off the roller than with a flat ceiling. Keep this in mind when you prepare the room with dropsheets and plastic and make sure every nook and cranny is covered.
If you’d prefer to have us over to give you a quote for your stucco ceiling or to have your stucco ceiling made flat, you can click here to book a quote online. We’ll have your stucco ceiling looking great!
Transform your home with lasting beauty!
by Craig | Nov 16, 2015 | DIY, General posts
 Should I keep my leftover paint? If so, what are the best ways to store leftover paint?
These are both very common questions which I will address in today’s post.
Should I keep my leftover paint? Yes, you’ll want to keep leftover paint for any touch-ups that need to be done in the future. When the exact same paint is used for the touch-up the touch-up will have the best chance of blending properly.
What if I just make note of the colour, shouldn’t that be enough? Not necessarily, we need to have the exact same product as well.
Different paint products show differently on the walls because they have different chemical compositions. This is fine if we are painting an entire wall, but can be problematic if we’re trying to do a small touch-up and not an entire wall.
What if I take note of both the colour and the product? This is much better and will usually work fine for touching up. However, there is still a small chance that there could be a variation between gallons, due to differences in calibration of the tinting machines at the paint store.
So, to be on the safe side – Keep your leftover paint.
How do I store my leftover paint?
The biggest thing is to store paint where it will not freeze – once paint freezes it becomes useless.
If you have paint in the garage right now, it should be brought inside. Generally I recommend bringing paint inside before the end of October.
Should I store paint in the original can, or can I transfer it to another container like a mason jar?
I would recommend keeping it in the original can, if possible. If we need to get more, the original can gives us the product name, and the paint formula which allows us to get the best match possible.
Whether you’re just looking to spruce things up a little bit with a few touch-ups or you want your place painted from top to bottom, schedule a quote and…
Transform your home with lasting beauty!

 A common question I am asked from my Toronto home painting clients is, “What’s the best brush and roller to use for a painting project?” It really depends on what you’re painting and the finish you want to achieve.


