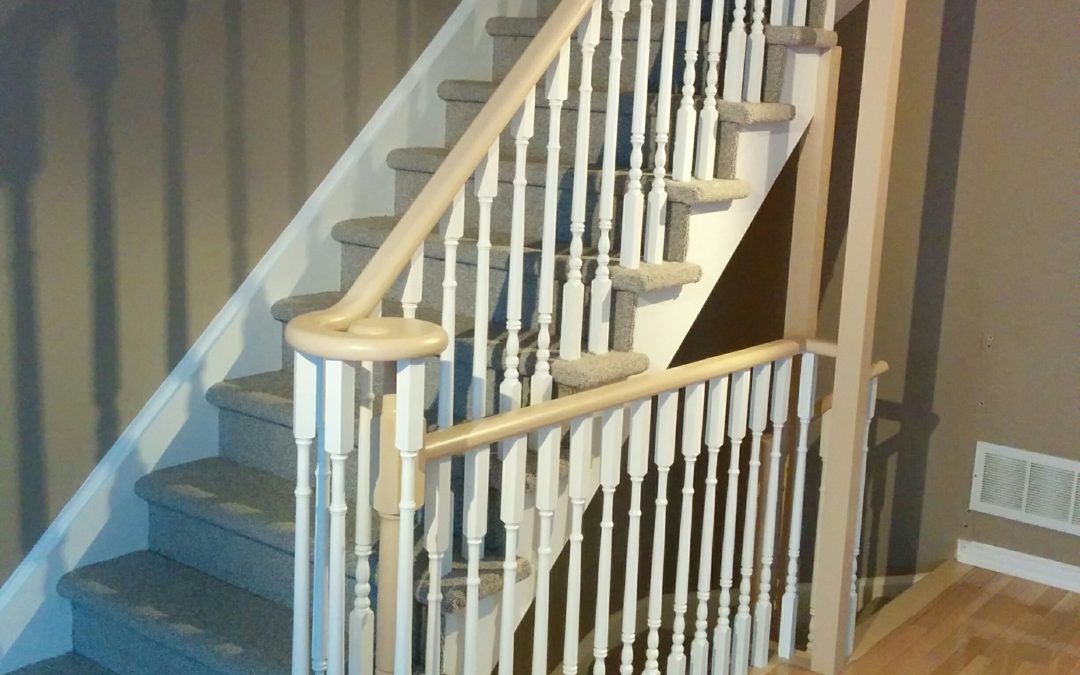
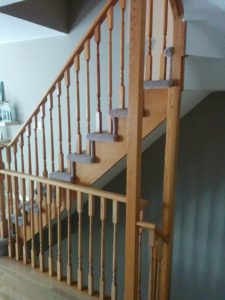
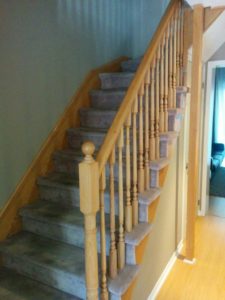
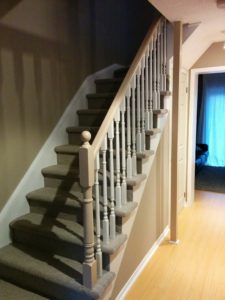
At CAM Painters, we just helped a customer undergo a recent railing transformation. This customer had railings, posts, and stringers that were varnished and they wanted to update the look. They decided to go with a two-tone look – white spindles and darker handrails and posts. I’ll go through all the steps we did, along with the materials used.
First off let’s take a look at the materials list that was needed for the railing project:
Toronto Home Railing Project: Materials
- Drop sheets
- Plastic film
- 220 grit sandpaper
- Tack cloths
- White-pigmented shellac based primer
- Brushes
- Mini – roller cages and sleeves
- Roller trays
The customer was having the carpet replaced as well, so here was the process that they used:
Toronto Home Railing Project: Carpet Replacement
- The carpet was removed
- They had us into paint when there was no carpet
- The new carpet was installed
- We came back and did a half hour of touch-ups
Toronto Home Railing Project: Painting
Step 1: We sanded the surface
Paint doesn’t stick as well to glossy surfaces which are prevalent with railings, so we gave everything a quick sand with a fine 220 grit sandpaper. This opens up the top layer of the varnish and allows the primer to penetrate deeper into the surface and create a better bond.
Step 2: We primed
We wanted to ensure that we had the most durable paint system that we could get, so priming was essential. Primer bonds to the railings surface and allows the finish coat to bond to it. An aggressive primer is needed to stick to a varnished surface because the varnish is so hard and glossy, so we chose white-pigmented shellac. Shellac bonds better than latex-based primers and even oil-based primers too, so it was the best choice in this case.
READ: Toronto Home Painting Tip: Steps for Painting Stained or Varnished Wood
Step 3: We painted
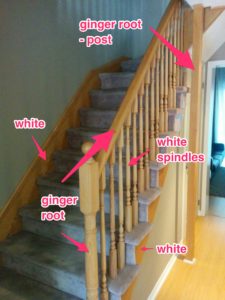
When multiple colours are used I like to put a marked up picture in our project management app for quick reference, so that all my guys know what colour goes where. It’s been said that a picture is worth a thousand words, and I think this is an instance that proves that saying right!
We did 2 coats of each colour using Sherwin Williams ProClassic Waterborne Alkyd. This paint dries very hard and durable and is suited for high-traffic areas like railings.
Step 4: We came back to do some touching up
The new carpet was installed, and the carpet installers did a wonderful job. However, even though they were very careful, a little damage was done to some of the spindles and posts. So after they finished, we came back and looked over the entire project and touched up the areas which required touching up.
READ: 3 Things Your Toronto Home Painter Wants You to Know
There you have it, from a dated stairwell to a thoroughly updated look!
Transform Your Home With Lasting Beauty!

