Are you looking for something a little different? Maybe you’ve found a wallpaper pattern that you like, but you can’t find it in the colour that you like?
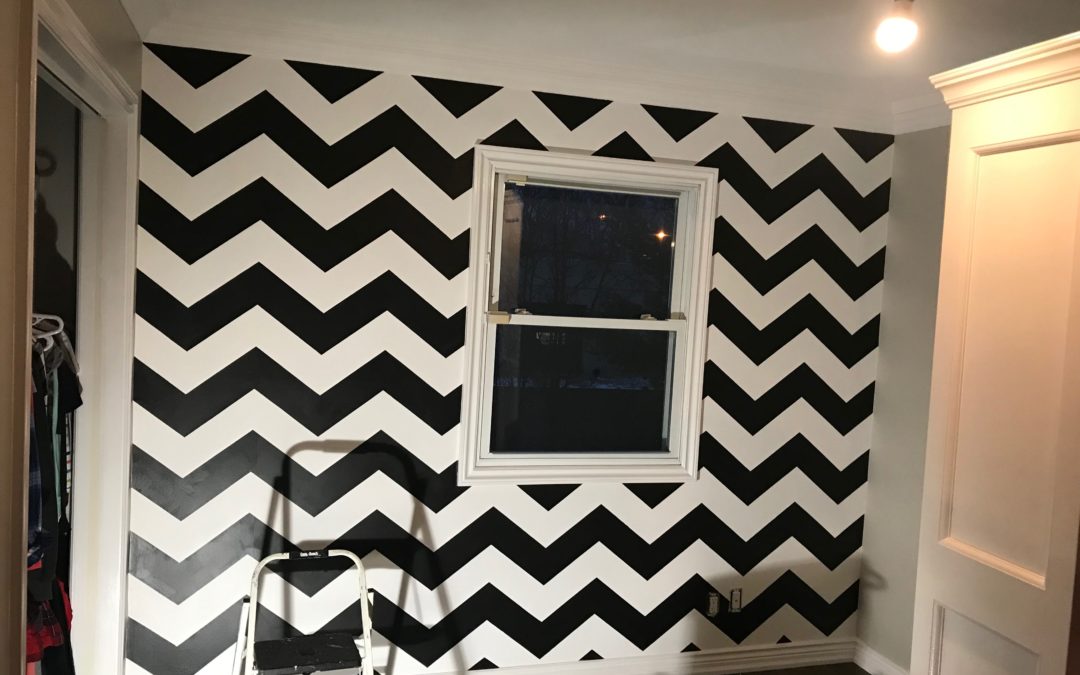
That’s what happened to this family. Their daughter wanted a specific pattern in a specific colour, she wanted a chevron pattern in black and white. Their interior designer tried to source a wallpaper, but nothing caught their fancy.
The solution, get a stencil and paint a chevron pattern on the wall! With paint, the colour choices for the accent wall are now unlimited!
Here’s what we did, step by step:
Paint the base colour
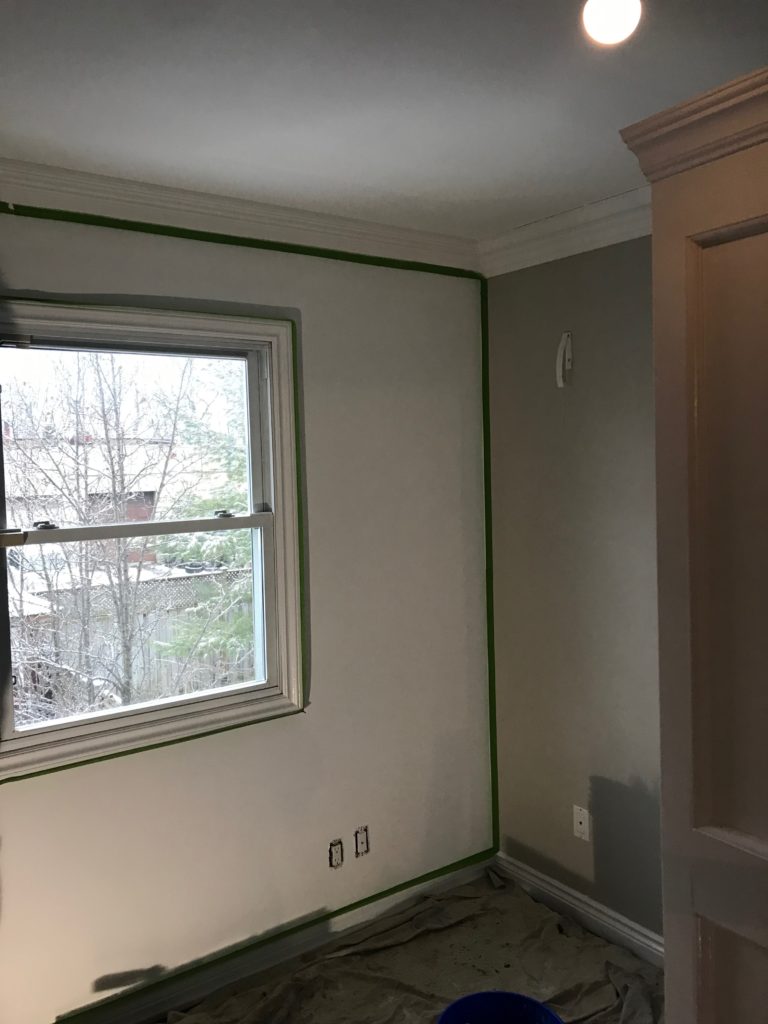
We decided to use the white as the basecoat. Darker colours usually hide better over lighter colours, rather than lighter over darker.
We used Benjamin Moore’s Chantilly Lace which is almost a pure white. Even using top quality paint, we need a few layers of paint to have it look nice and evenly coloured. So we primed twice, followed by 2 coats of finish.
Once the base colour is done we needed to make sure it had enough time to fully dry, so we left it until the next day.
Prepping for the stencilling
Stencilling can be a little messy, so we taped around the perimeter of the wall, and around the window. Basically we taped off any adjacent areas that we didn’t want our stencil colour on.
Next, we wanted to minimize bleeding around the edges of our stencil, so we took spray adhesive and sprayed the back of our stencil. We let it dry for a few minutes, we wanted it to be slightly tacky, but not so sticky that it would take paint off the wall.
Stencilling our pattern
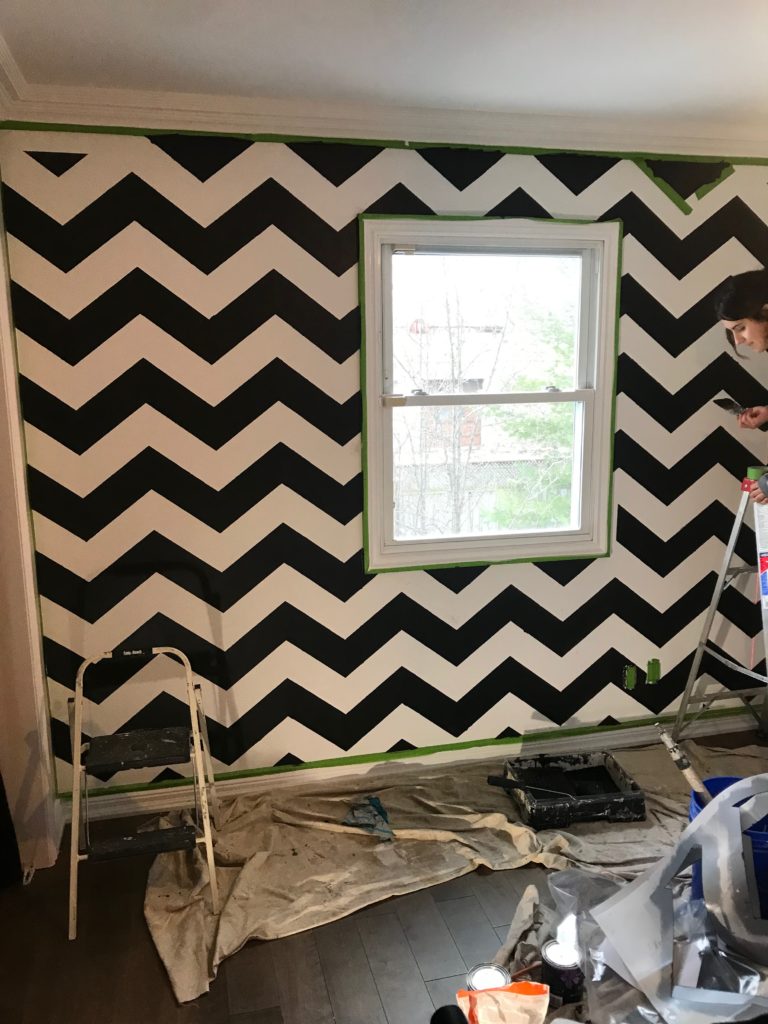
We used our laser level to keep everything in line. Basically we lined it up with the bottom corner of each chevron.
We started at the top of the wall and worked our way down. After we finished each vertical section, we moved the stencil back to the top and did the next section over, in the same manner.
With stencilling we had to use very little paint, to avoid the paint bleeding underneath. So we used 3 coats, and took our time, so that it could dry before the next coat was applied. In fact, we put a hair dryer on the drying paint, just to speed it up a little.
Even still, we had some bleeding paint, which we had to go back after and fix.
We had to respray the back of our stencil every 15-20 min, just to keep it tacky.
In the corners and around the window we bent the stencil and got in as far as we could. Afterwards we finished the pattern off using some tape.
Final touches
After we did our stencil, we let the paint dry to the touch. Then we finished off the pattern in the corners by taping the edges. Anywhere where the black bled under the stencil, we taped and painted a little white along the edges.
For taping we really like Frog Tape, which has virtually no bleed through along the edge. Just remember to press firmly along the length of the tape, to stick it down!
In conclusion
This was a fun project and the client absolutely loved it. If you’re interested in exploring doing an accent wall in your home, why don’t you schedule a quote? We’d love to Transform Your Home With Lasting Beauty!