Have you ever thought about having a chalkboard calendar in your Toronto home? How about a magnetic chalkboard calendar?
We did just that for a cooking studio in the west end of Toronto.
WATCH THE VIDEO:
Here are the steps that we did…
Products
- Tape – We used Frog Tape for the border and ¼” tape for the grid lines
- Activewall magnetic primer – It’s the primer that gives the wall it’s ability to hold on to magnets. Be sure to purchase enough as 1 gallon will only cover 100 sq. ft.
- Activewall chalkboard paint
- Drop sheets
- Rollers and roller trays
- Laser level
- Measuring tape
- Patience, lot’s of patience!
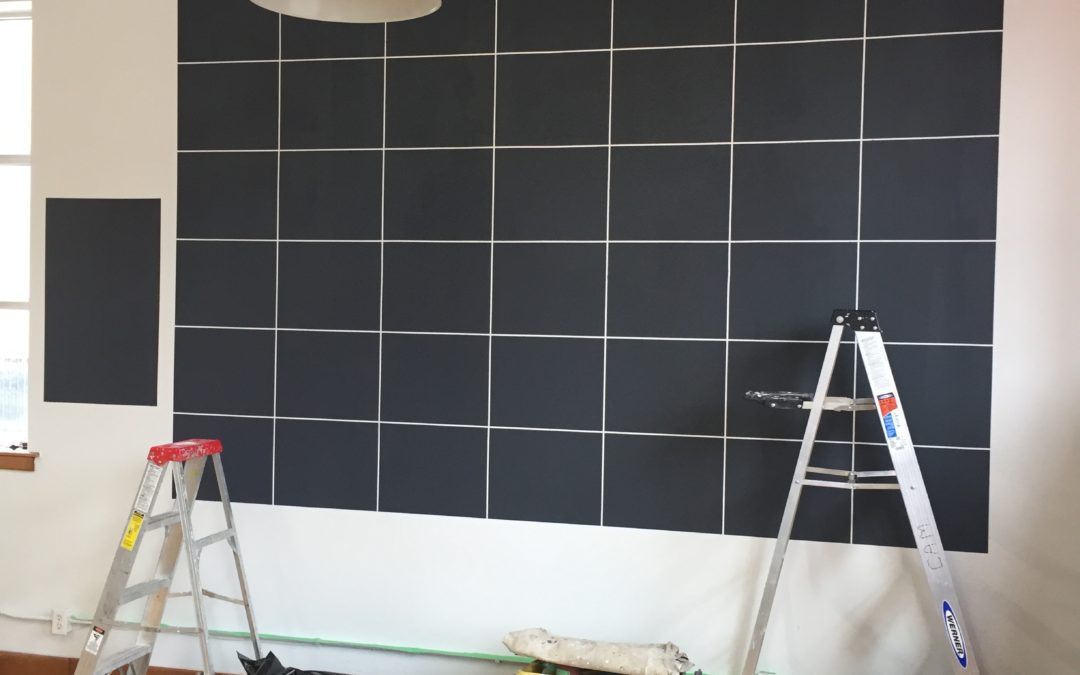
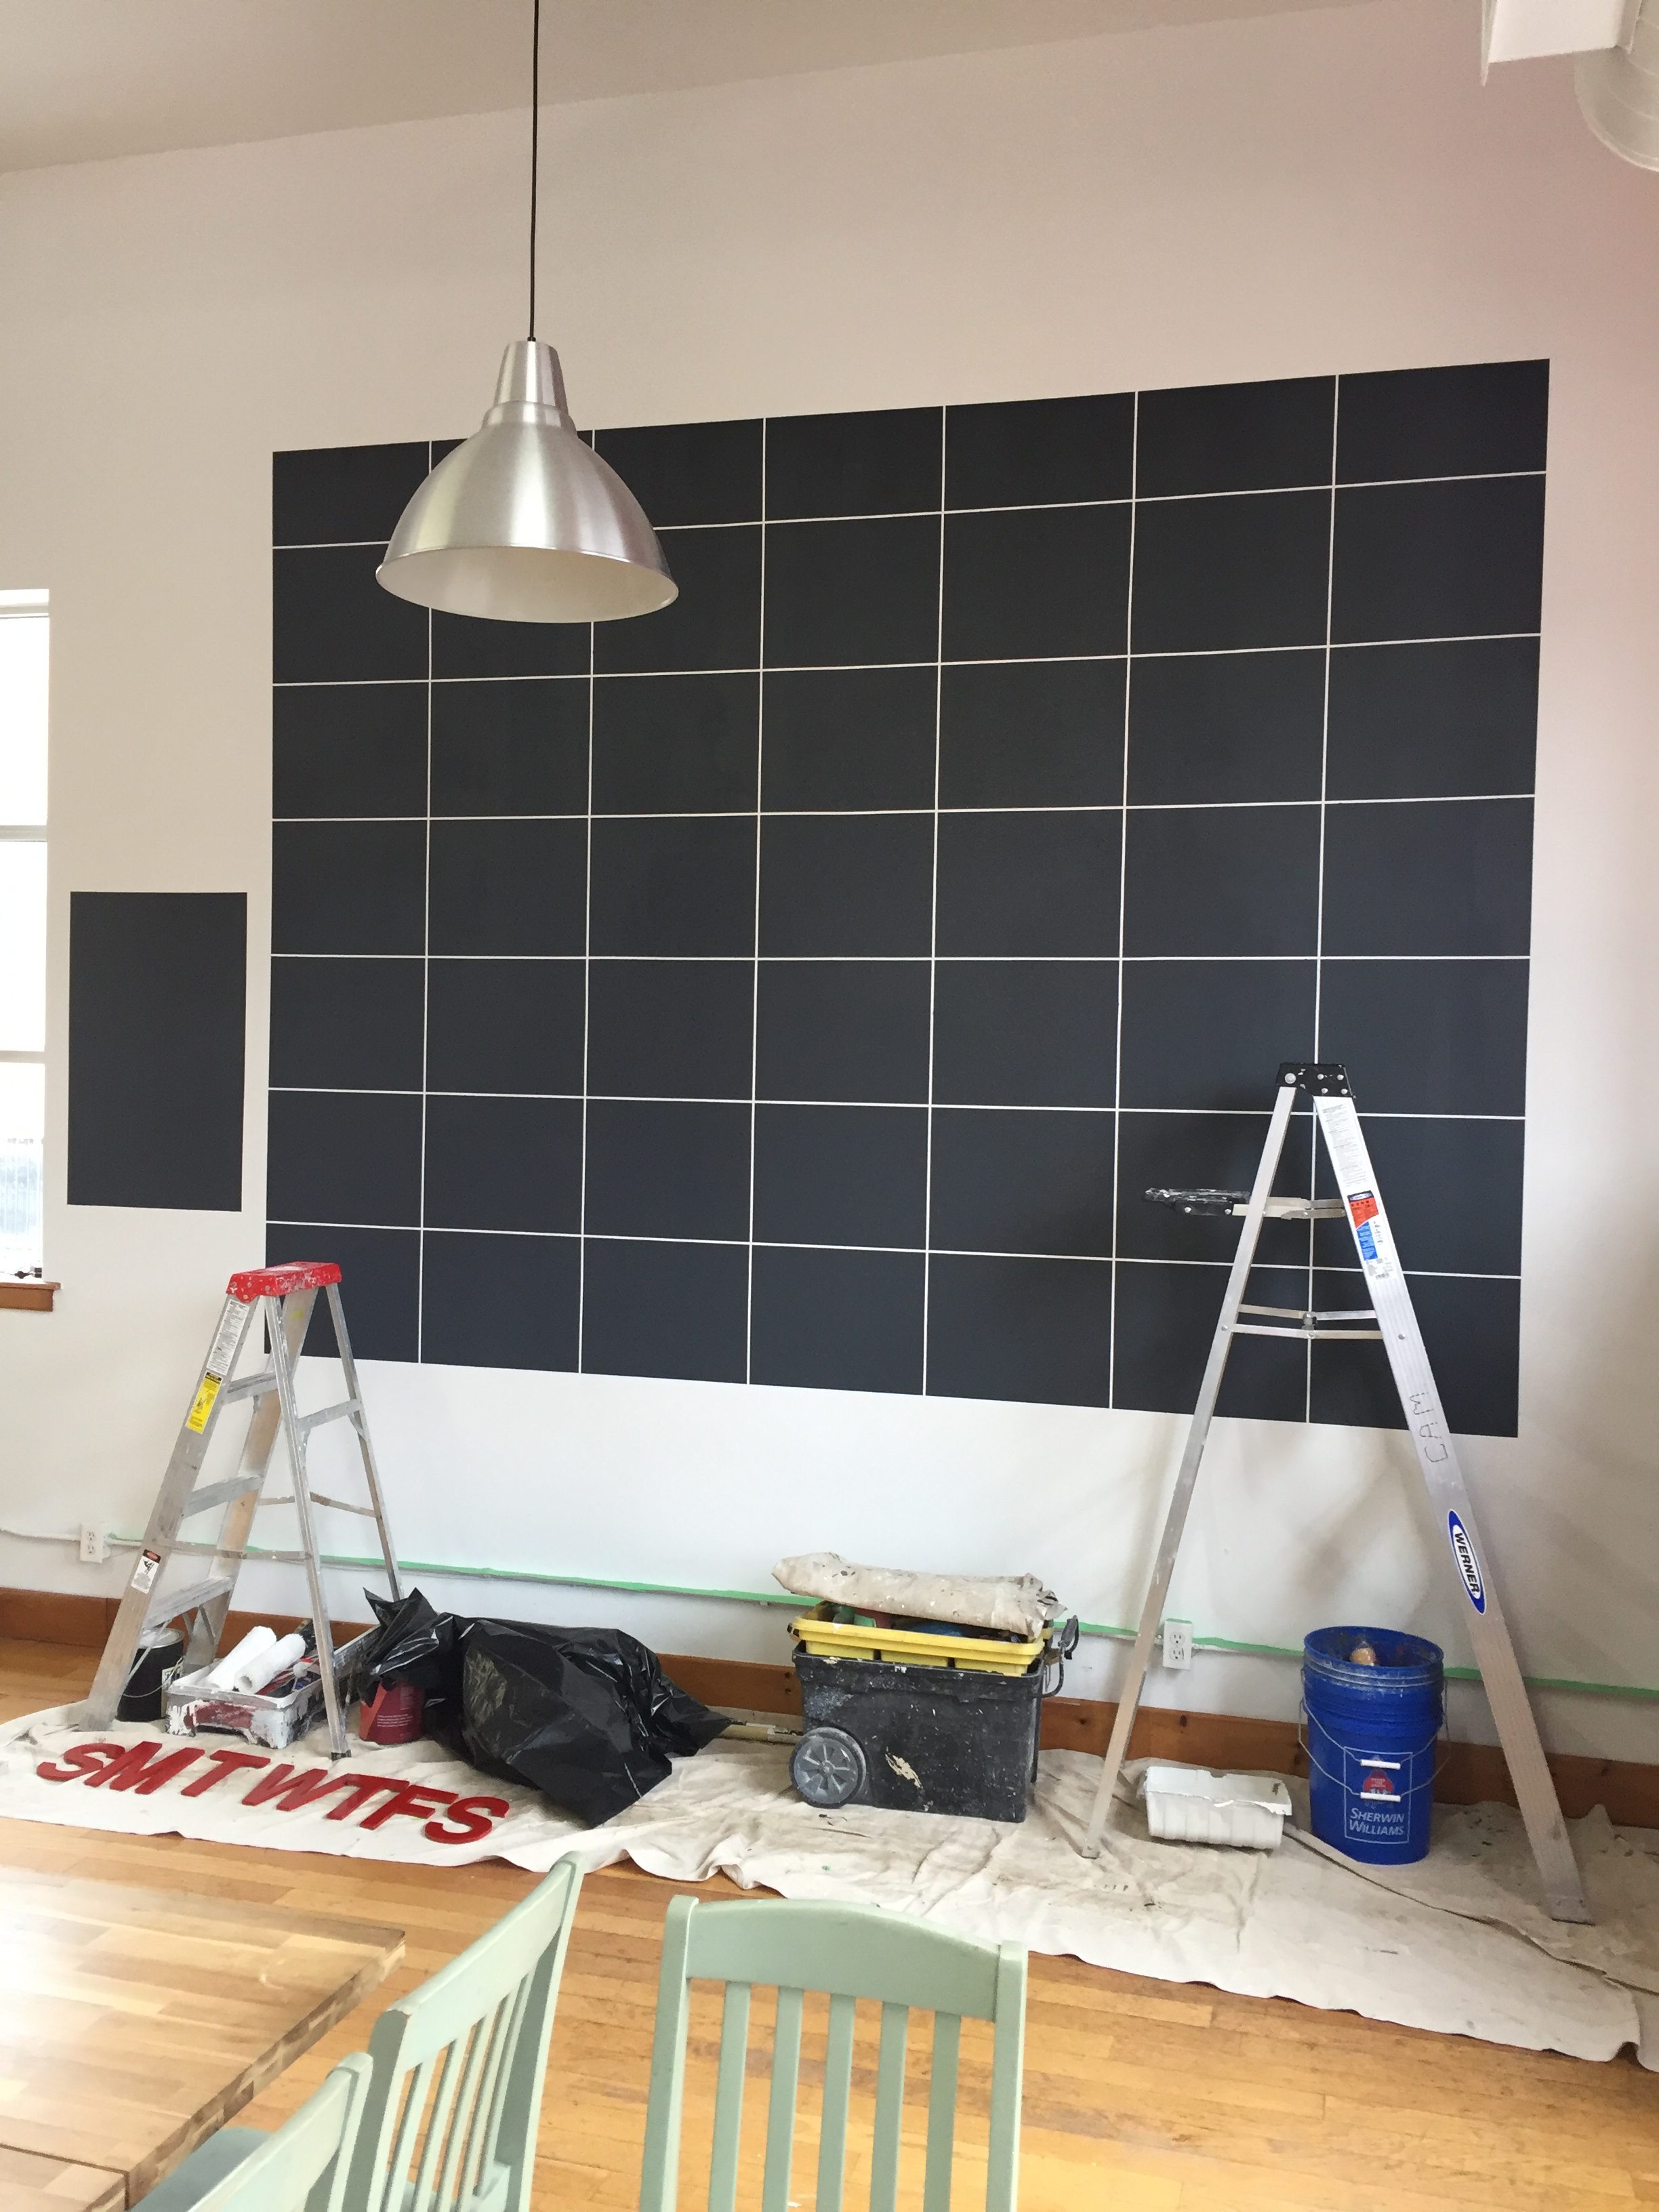
Chalkboard Calendar Layout
Our calendar ended up being 133” wide by 100” tall, each square ended up being 19” wide by 15” tall.
In order to get straight lines we used a laser level to line up the border, which we t aped off first. We made sure that we pressed down on the entire length of the tape, so that the paint wouldn’t bleed underneath.
Then we marked off the location of the grid lines, which we then taped off with the ¼” tape. We decided to tape the horizontal lines first and then the verticals.
READ MORE: How to create sharp lines with painter’s tape!
Priming
The primer has to be coated thick to ensure that magnets will stick to it. In order to get the recommended coverage we needed to do 3 coats of the primer.
 The manufacturer recommends that the primer dries for 12 hours before applying the finish coat. We decided to take the tape off as soon as we were finished priming, and then re-tape the following day. Why did we do this? Because the primer goes on so thick, once it dries there will be a lot of surface tension. So if we pulled the tape after the primer was fully dry, there would be a risk of peeling some of the paint off with the primer.
Finish coat
The day following we checked over our primer and made sure it was nice and smooth for the chalkboard paint. Any little flecks of debris were sanded off.
We re-taped the layout, this time using the layout of the primer as our guide, rather than a laser level.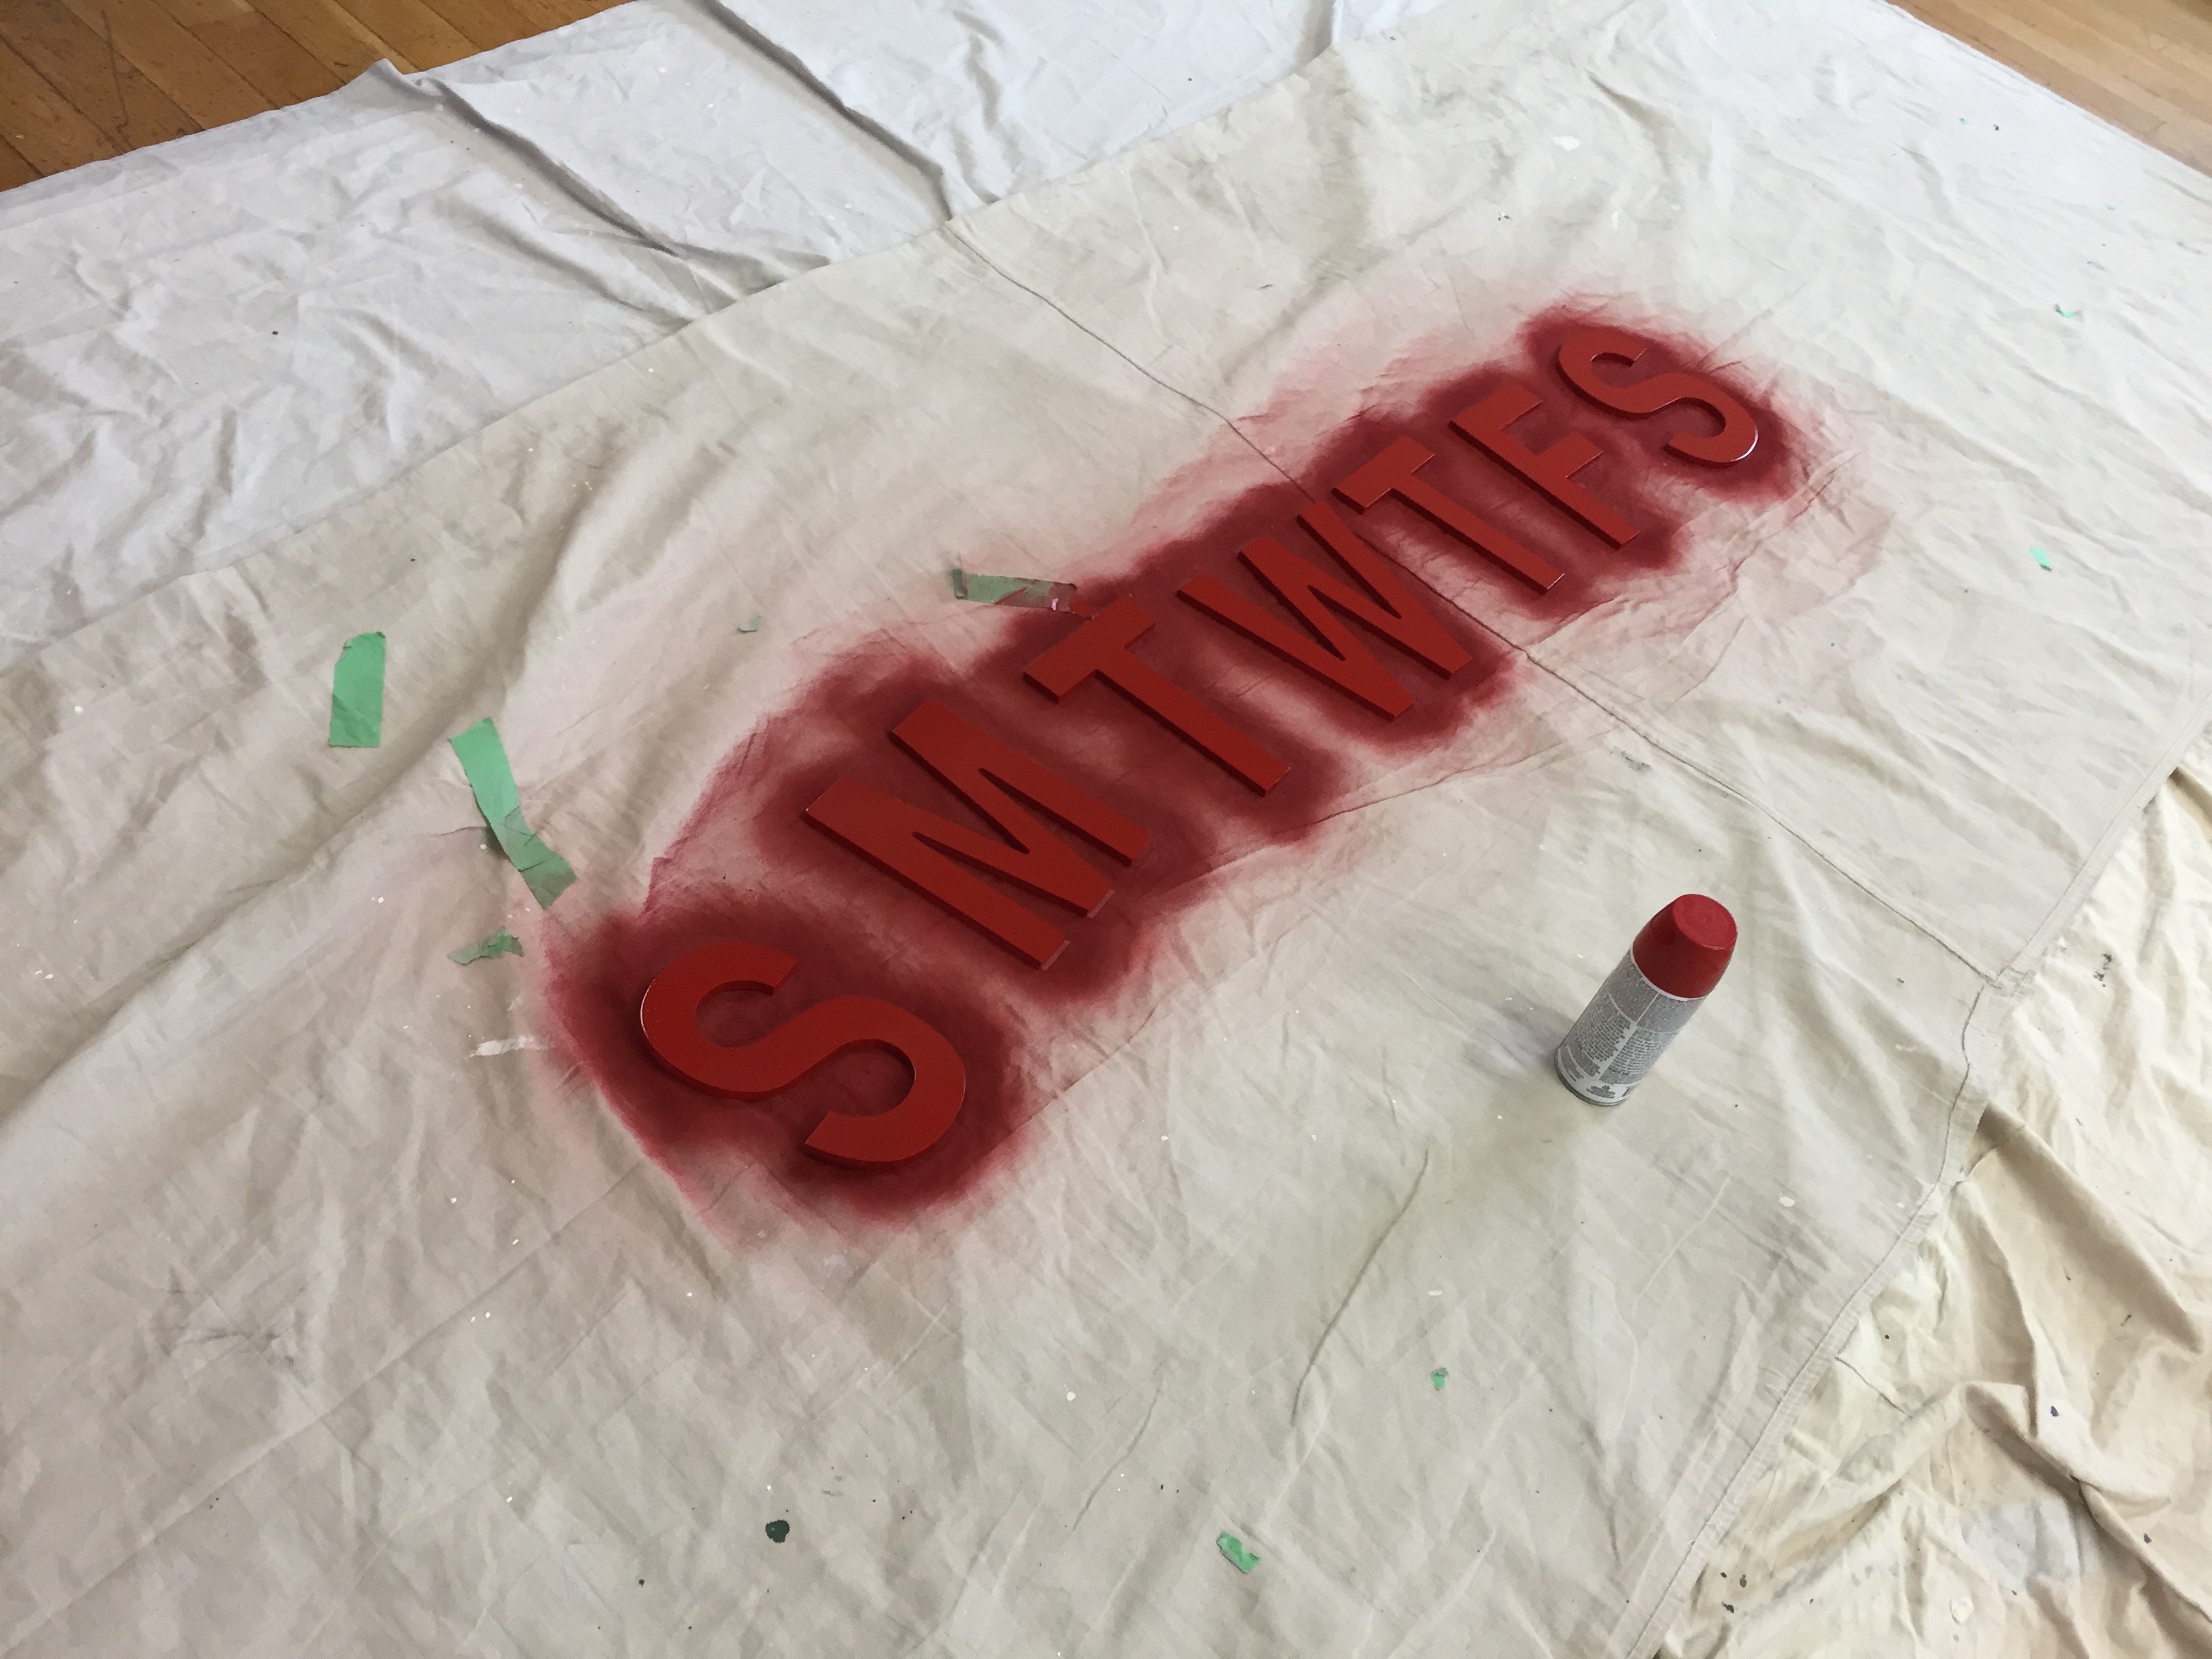
Then the chalkboard paint was rolled on, one coat being sufficient. The thicker the finish coat, the less magnetic the surface will be, so it’s important to coat the surface as thin as possible.
The tape was then peeled to reveal our wonderful chalkboard calendar!
Finishing touches
Our client purchased some wood letters for the days of the week, which we painted with gloss red paint. These were mounted using construction adhesive.
One thing to keep in mind is that 24 hours dry time is needed before the chalkboard can be used and a full week is needed before the chalkboard can be wiped down. This is very common for paint, most needs a couple of weeks before it can be washed.
In conclusion
If this is something that you’d like done for your home or place of business, why don’t you book a quote online? We’d love to Transform Your Home (or business) With Lasting Beauty!