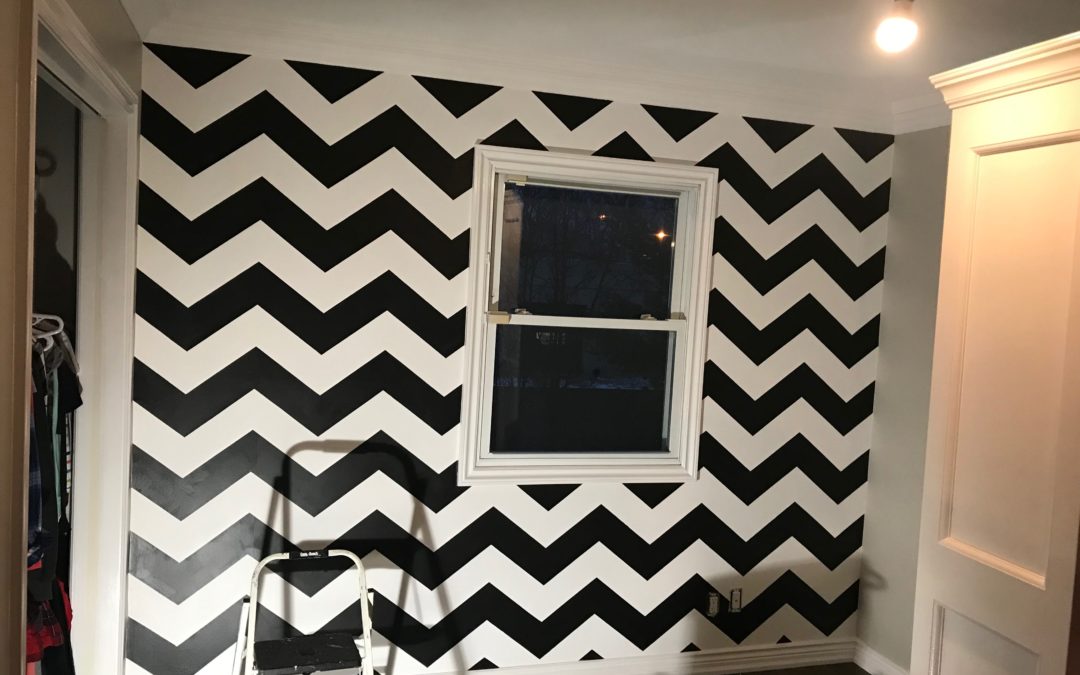
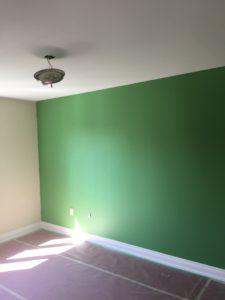
Are you looking for something a little different? Maybe you’ve found a wallpaper pattern that you like, but you can’t find it in the colour that you like?
That’s what happened to this family. Their daughter wanted a specific pattern in a specific colour, she wanted a chevron pattern in black and white. Their interior designer tried to source a wallpaper, but nothing caught their fancy.
The solution, get a stencil and paint a chevron pattern on the wall! With paint, the colour choices for the accent wall are now unlimited!
Here’s what we did, step by step:
Paint the base colour
We decided to use the white as the basecoat. Darker colours usually hide better over lighter colours, rather than lighter over darker.
We used Benjamin Moore’s Chantilly Lace which is almost a pure white. Even using top quality paint, we need a few layers of paint to have it look nice and evenly coloured. So we primed twice, followed by 2 coats of finish.
Once the base colour is done we needed to make sure it had enough time to fully dry, so we left it until the next day.
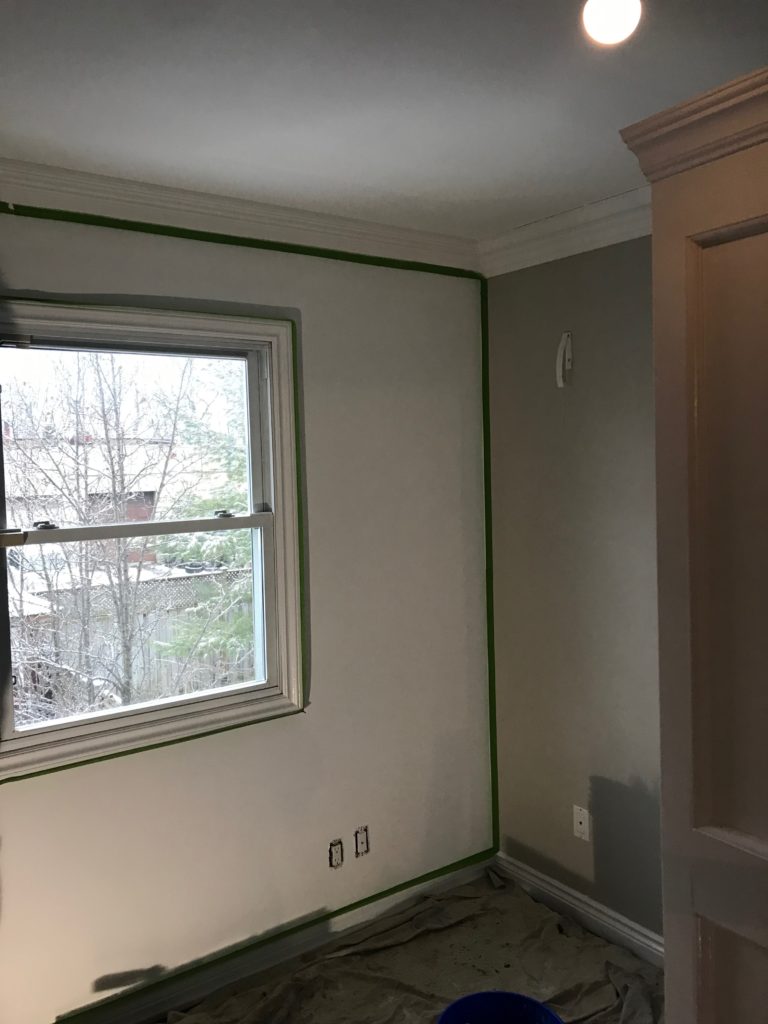
Prepping for the stencilling
Stencilling can be a little messy, so we taped around the perimeter of the wall, and around the window. Basically we taped off any adjacent areas that we didn’t want our stencil colour on.
Next, we wanted to minimize bleeding around the edges of our stencil, so we took spray adhesive and sprayed the back of our stencil. We let it dry for a few minutes, we wanted it to be slightly tacky, but not so sticky that it would take paint off the wall.
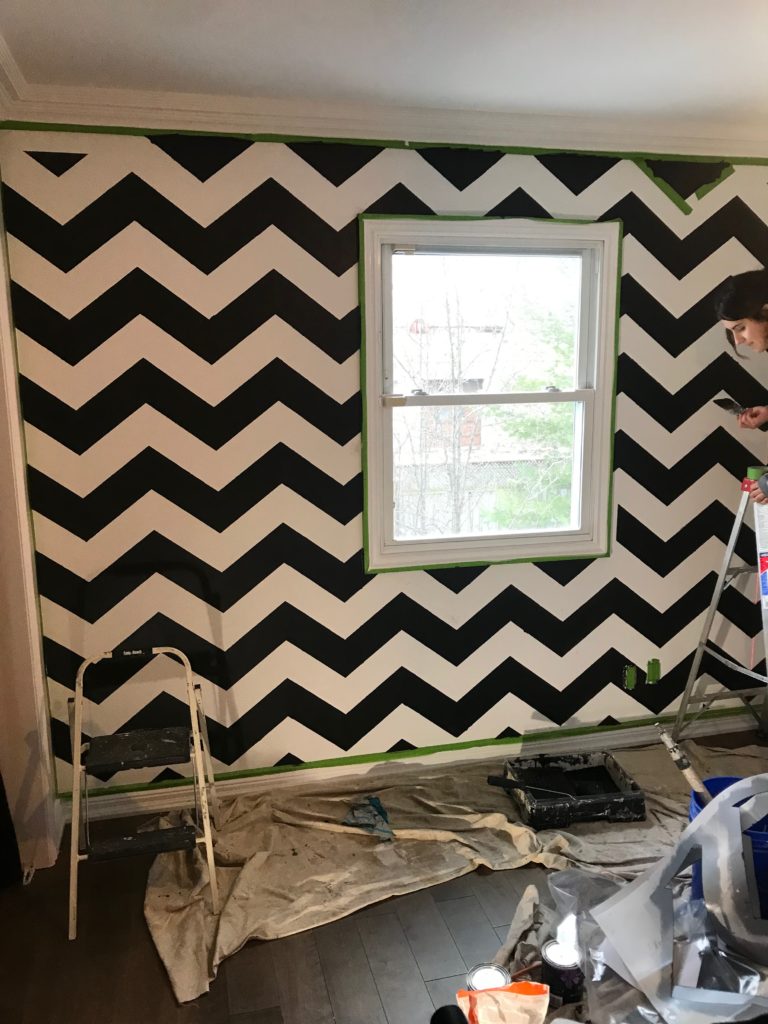
Stencilling our pattern
We used our laser level to keep everything in line. Basically we lined it up with the bottom corner of each chevron.
We started at the top of the wall and worked our way down. After we finished each vertical section, we moved the stencil back to the top and did the next section over, in the same manner.
With stencilling we had to use very little paint, to avoid the paint bleeding underneath. So we used 3 coats, and took our time, so that it could dry before the next coat was applied. In fact, we put a hair dryer on the drying paint, just to speed it up a little.
Even still, we had some bleeding paint, which we had to go back after and fix.
We had to respray the back of our stencil every 15-20 min, just to keep it tacky.
In the corners and around the window we bent the stencil and got in as far as we could. Afterwards we finished the pattern off using some tape.
Final touches
After we did our stencil, we let the paint dry to the touch. Then we finished off the pattern in the corners by taping the edges. Anywhere where the black bled under the stencil, we taped and painted a little white along the edges.
For taping we really like Frog Tape, which has virtually no bleed through along the edge. Just remember to press firmly along the length of the tape, to stick it down!
In conclusion
This was a fun project and the client absolutely loved it. If you’re interested in exploring doing an accent wall in your home, why don’t you schedule a quote? We’d love to Transform Your Home With Lasting Beauty!
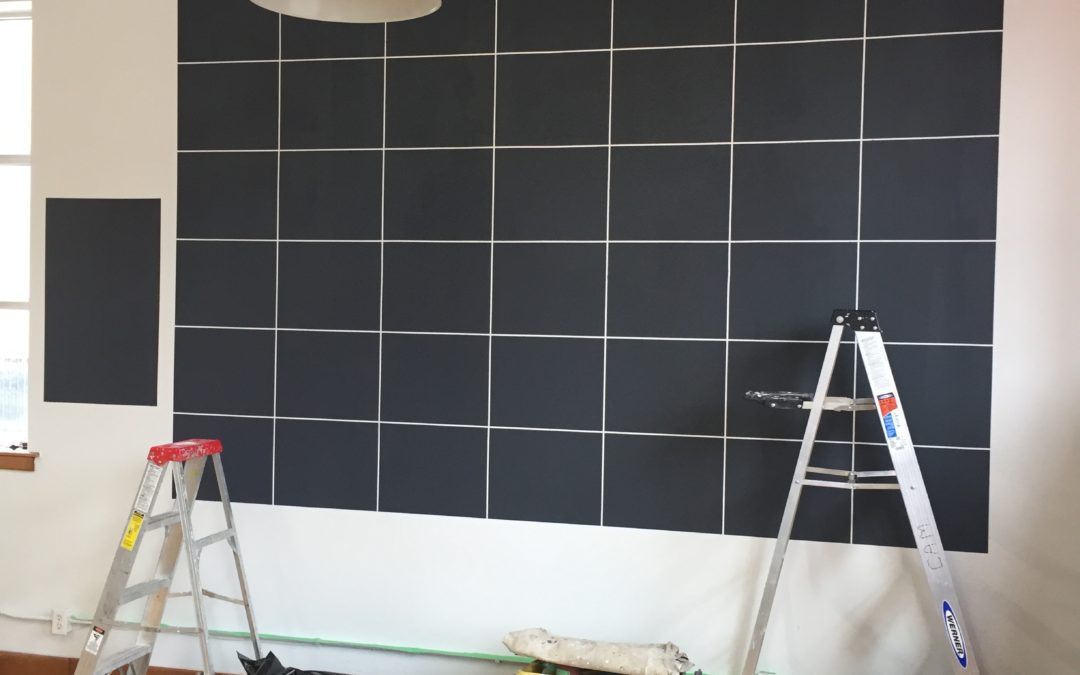
Have you ever thought about having a chalkboard calendar in your Toronto home? How about a magnetic chalkboard calendar?
We did just that for a cooking studio in the west end of Toronto.
WATCH THE VIDEO:
Here are the steps that we did…
Products
Tape – We used Frog Tape for the border and ¼” tape for the grid lines
Activewall magnetic primer – It’s the primer that gives the wall it’s ability to hold on to magnets. Be sure to purchase enough as 1 gallon will only cover 100 sq. ft.
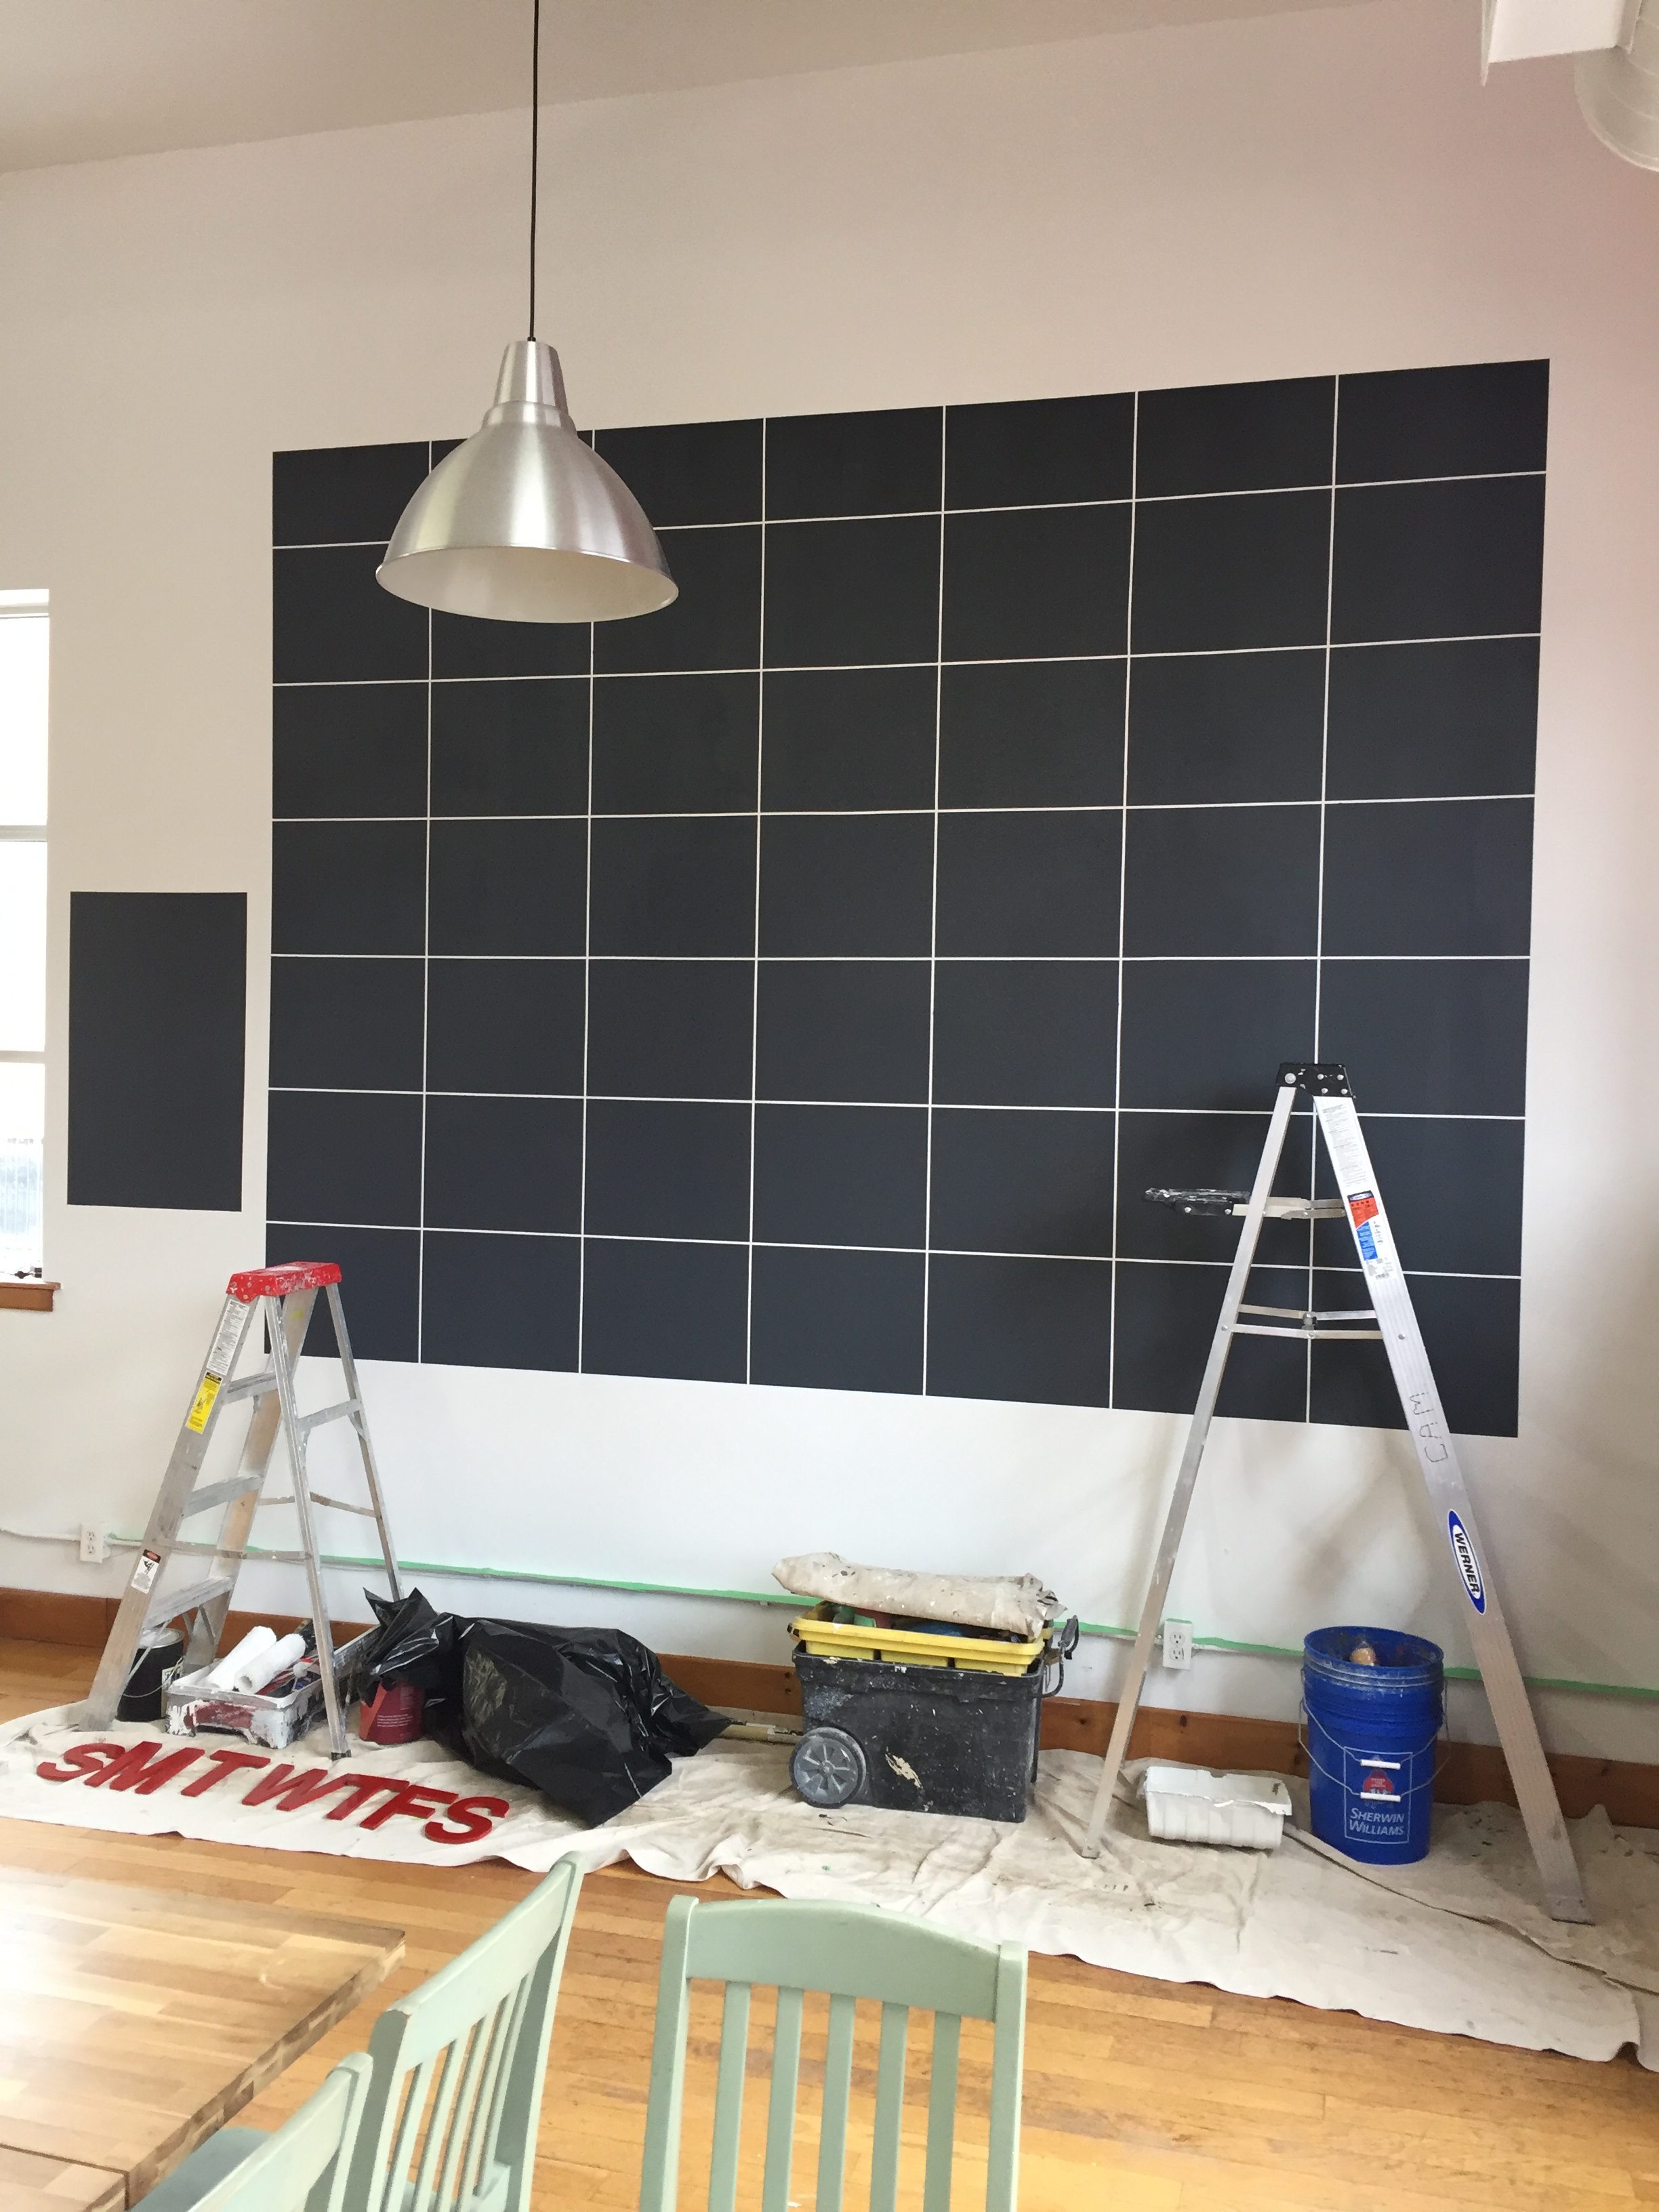
Our calendar ended up being 133” wide by 100” tall, each square ended up being 19” wide by 15” tall.
In order to get straight lines we used a laser level to line up the border, which we taped off first. We made sure that we pressed down on the entire length of the tape, so that the paint wouldn’t bleed underneath.
Then we marked off the location of the grid lines, which we then taped off with the ¼” tape. We decided to tape the horizontal lines first and then the verticals.
The primer has to be coated thick to ensure that magnets will stick to it. In order to get the recommended coverage we needed to do 3 coats of the primer.
The manufacturer recommends that the primer dries for 12 hours before applying the finish coat. We decided to take the tape off as soon as we were finished priming, and then re-tape the following day. Why did we do this? Because the primer goes on so thick, once it dries there will be a lot of surface tension. So if we pulled the tape after the primer was fully dry, there would be a risk of peeling some of the paint off with the primer.
Finish coat
The day following we checked over our primer and made sure it was nice and smooth for the chalkboard paint. Any little flecks of debris were sanded off.
We re-taped the layout, this time using the layout of the primer as our guide, rather than a laser level.
Then the chalkboard paint was rolled on, one coat being sufficient. The thicker the finish coat, the less magnetic the surface will be, so it’s important to coat the surface as thin as possible.
The tape was then peeled to reveal our wonderful chalkboard calendar!
Finishing touches
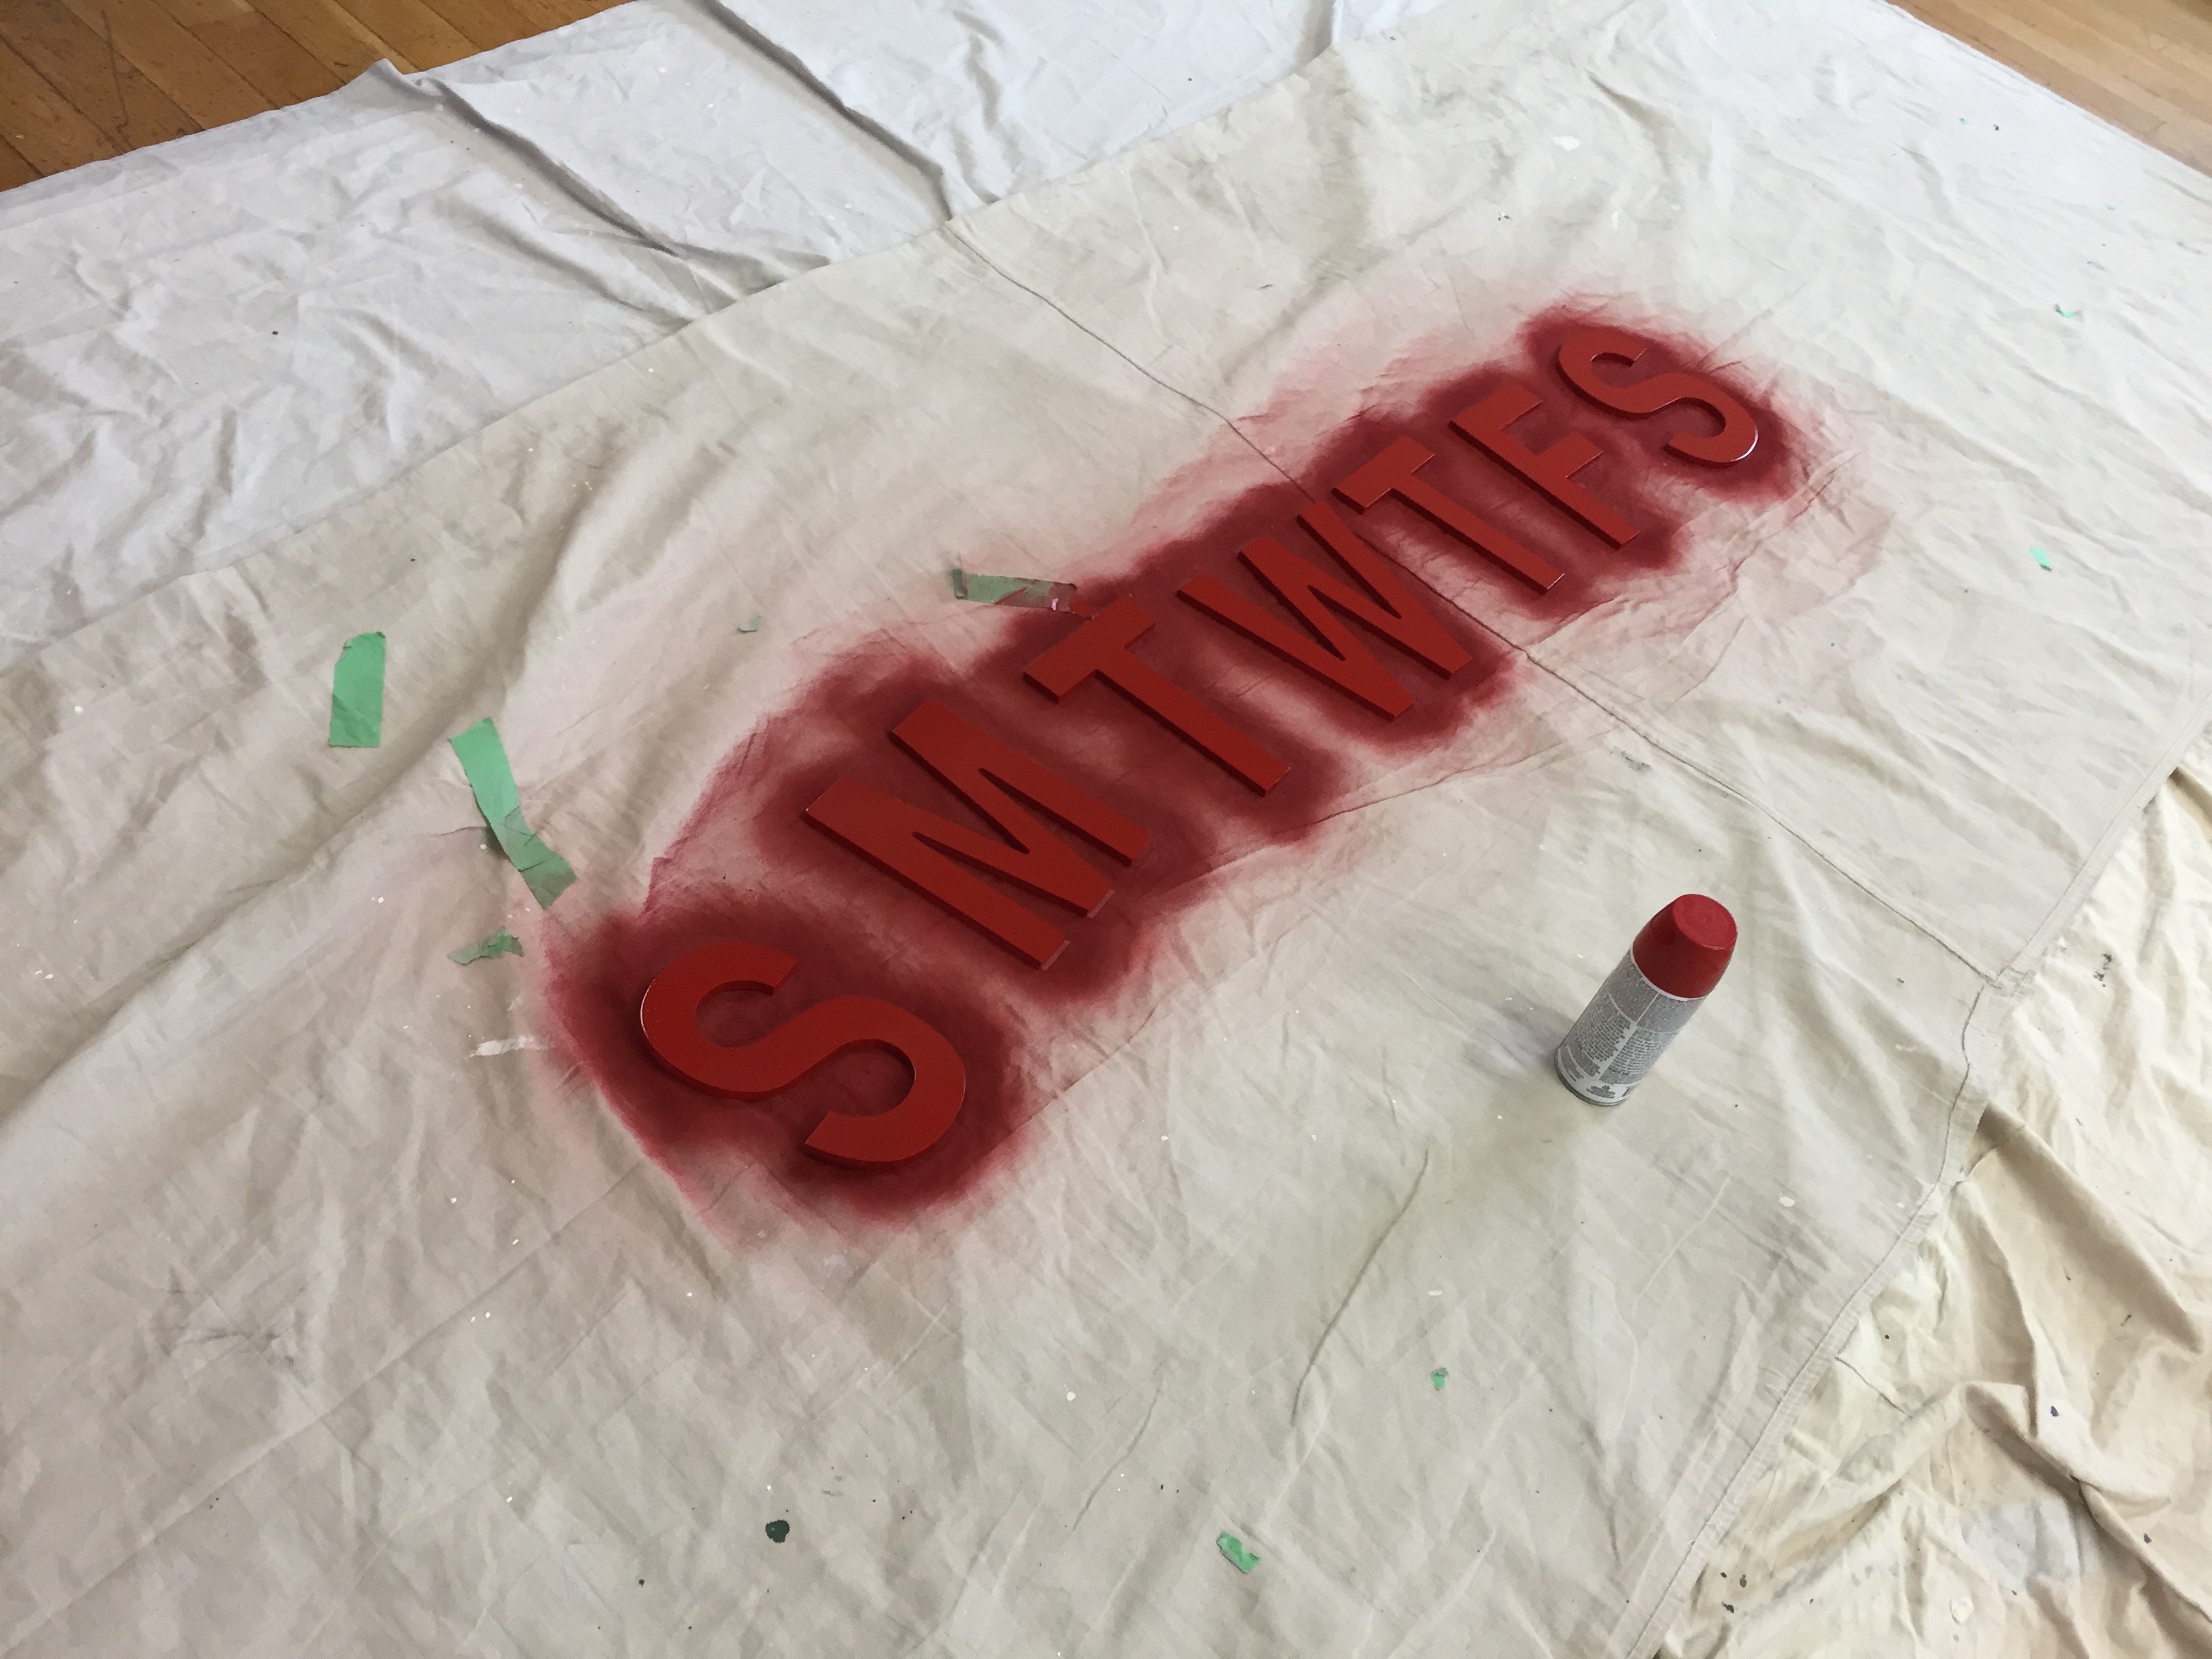
Our client purchased some wood letters for the days of the week, which we painted with gloss red paint. These were mounted using construction adhesive.
One thing to keep in mind is that 24 hours dry time is needed before the chalkboard can be used and a full week is needed before the chalkboard can be wiped down. This is very common for paint, most needs a couple of weeks before it can be washed.
In conclusion
If this is something that you’d like done for your home or place of business, why don’t you book a quote online? We’d love to Transform Your Home (or business) With Lasting Beauty!
So you’re thinking about bold colours for your Toronto home? Bold colours can be tricky to paint with, so here’s our list of tips to make sure that it goes smoothly.
Coverage
Intense colours are notorious for bad coverage. I’ve heard many stories about certain intense colours taking 7, 8 or more coats, and they still don’t look right.
First, let’s explore why this is so. Paint comes in different bases starting with a white base, all the way to a clear base. To these bases tint is added to achieve the desired colour. For a very light colour, not much tint is needed and the the paint is able to get a lot if it’s coverage from what’s in the can of paint.
As we go to more intense colours, such as bright reds, bright blues, oranges, bright yellows a clear base is used. If a white base was used, the colour would be muted and not bright at all. When a clear base is used, the paint is getting all it’s hiding power from the tint alone. Therefore, in most cases the paint looks almost translucent and requires many coats to cover.
There are some steps you can take to minimize the number of coats required and end up with a better finished product.
First, Use a grey primer
If you use a grey primer, you’ll be further ahead than just painting over the previous paint, or using a primer of any other colour. The depth of grey should be matched to the depth of the topcoat colour – any reputable paint store should be able to advise on the particular depth of grey primer to use.
Second, Be careful when choosing level of sheen
Tint gives the paint more sheen, which doesn’t matter for most colours. However when dealing with bold colours with a lot of tint, the effect can be that an eggshell looks closer to a semi gloss, or a flat looks closer to an eggshell. So choose your sheen level wisely and perhaps choose a less glossy sheen than you would otherwise.
Third, Be careful with your brushing and rolling technique
The extra tint can cause the paint to leave more texture, or stipple than normal. Basically, you’ll want to be extra careful that you’re not leaving any unevenness in the paint when you roll it out. I would also brush and roll one wall at a time, just to be on the safe side, rather than brush the entire room and then roll.
Expect that you might need an extra coat with bold colours
Even with all these steps, you still might need a 3rd or even a 4th coat. So make sure you’ve given yourself enough time that you can come back the next day for another coat or two.
Some product recommendations
When it comes to bold colours we find that Benjamin Moore Aura offers the best coverage. However this paint can be a little difficult to work with, be sure to follow all the directions on the can and ask the paint store clerk if you have any questions.
Bold colours can really transform a space! If you’d rather leave the application to someone else why don’t you book a quote? We’d be happy to transform your home with lasting beauty!
Here is the official CAM Painters guide to trim painting! Do you want your trim looking silky smooth and nice? Read on…
Determine if you need to prime your trim
There are a couple of situations where a primer is recommended.
First, if you’re painting over bare wood, a primer seals the wood and provides a sandable surface before painting.
If you’re painting over varnished wood, a primer will help the paint adhere to the surface.
If you’re painting over an oil paint, a primer will help with adhesion. To test if your trim is currently painted in oil, put some acetone (nail polish remover) on a rag and rub it on the surface. If the paint comes off on the rag you have latex paint, if not, you likely have oil paint.
Lightly sand your trim
Your existing trim likely has a somewhat glossy finish, so it’s a good practice to lightly sand your trim. The purpose of this is twofold:
It smooths out any rough spots, drips, ridges that are currently in the trim, so that the surface is nice and smooth for all subsequent steps.
It de-glosses the surface, so that primer and/or paint can penetrate deeper and bond better with the surface.
Prime your trim – if necessary
If you have determined that you need to prime (refer to first step) here is the procedure:
Apply it with brush or wizz roller (for flat doors or other wide, flat areas)
Apply it in thin coats – the goal is giving the finish coat something to grab into, not coverage
Allow enough cure time before topcoating (usually an hour or two)
Fill any holes and gaps
After priming, it’s an ideal time to inspect the surface for any nail holes or gaps. These can easily be caulked, just be sure to smooth out the caulking after so that there are no lumps in the surface.
Give the primer a very light sand
Using 200 or higher grit sandpaper give the primer a light sand. Sometimes bare wood fibers can be raised after its primed, so smooth out these areas with your sandpaper. Also, inspect and make sure there are no rough areas that were missed on the first sanding. You just want to smooth out the surface, not penetrate down to the bare wood, so just use a light touch.
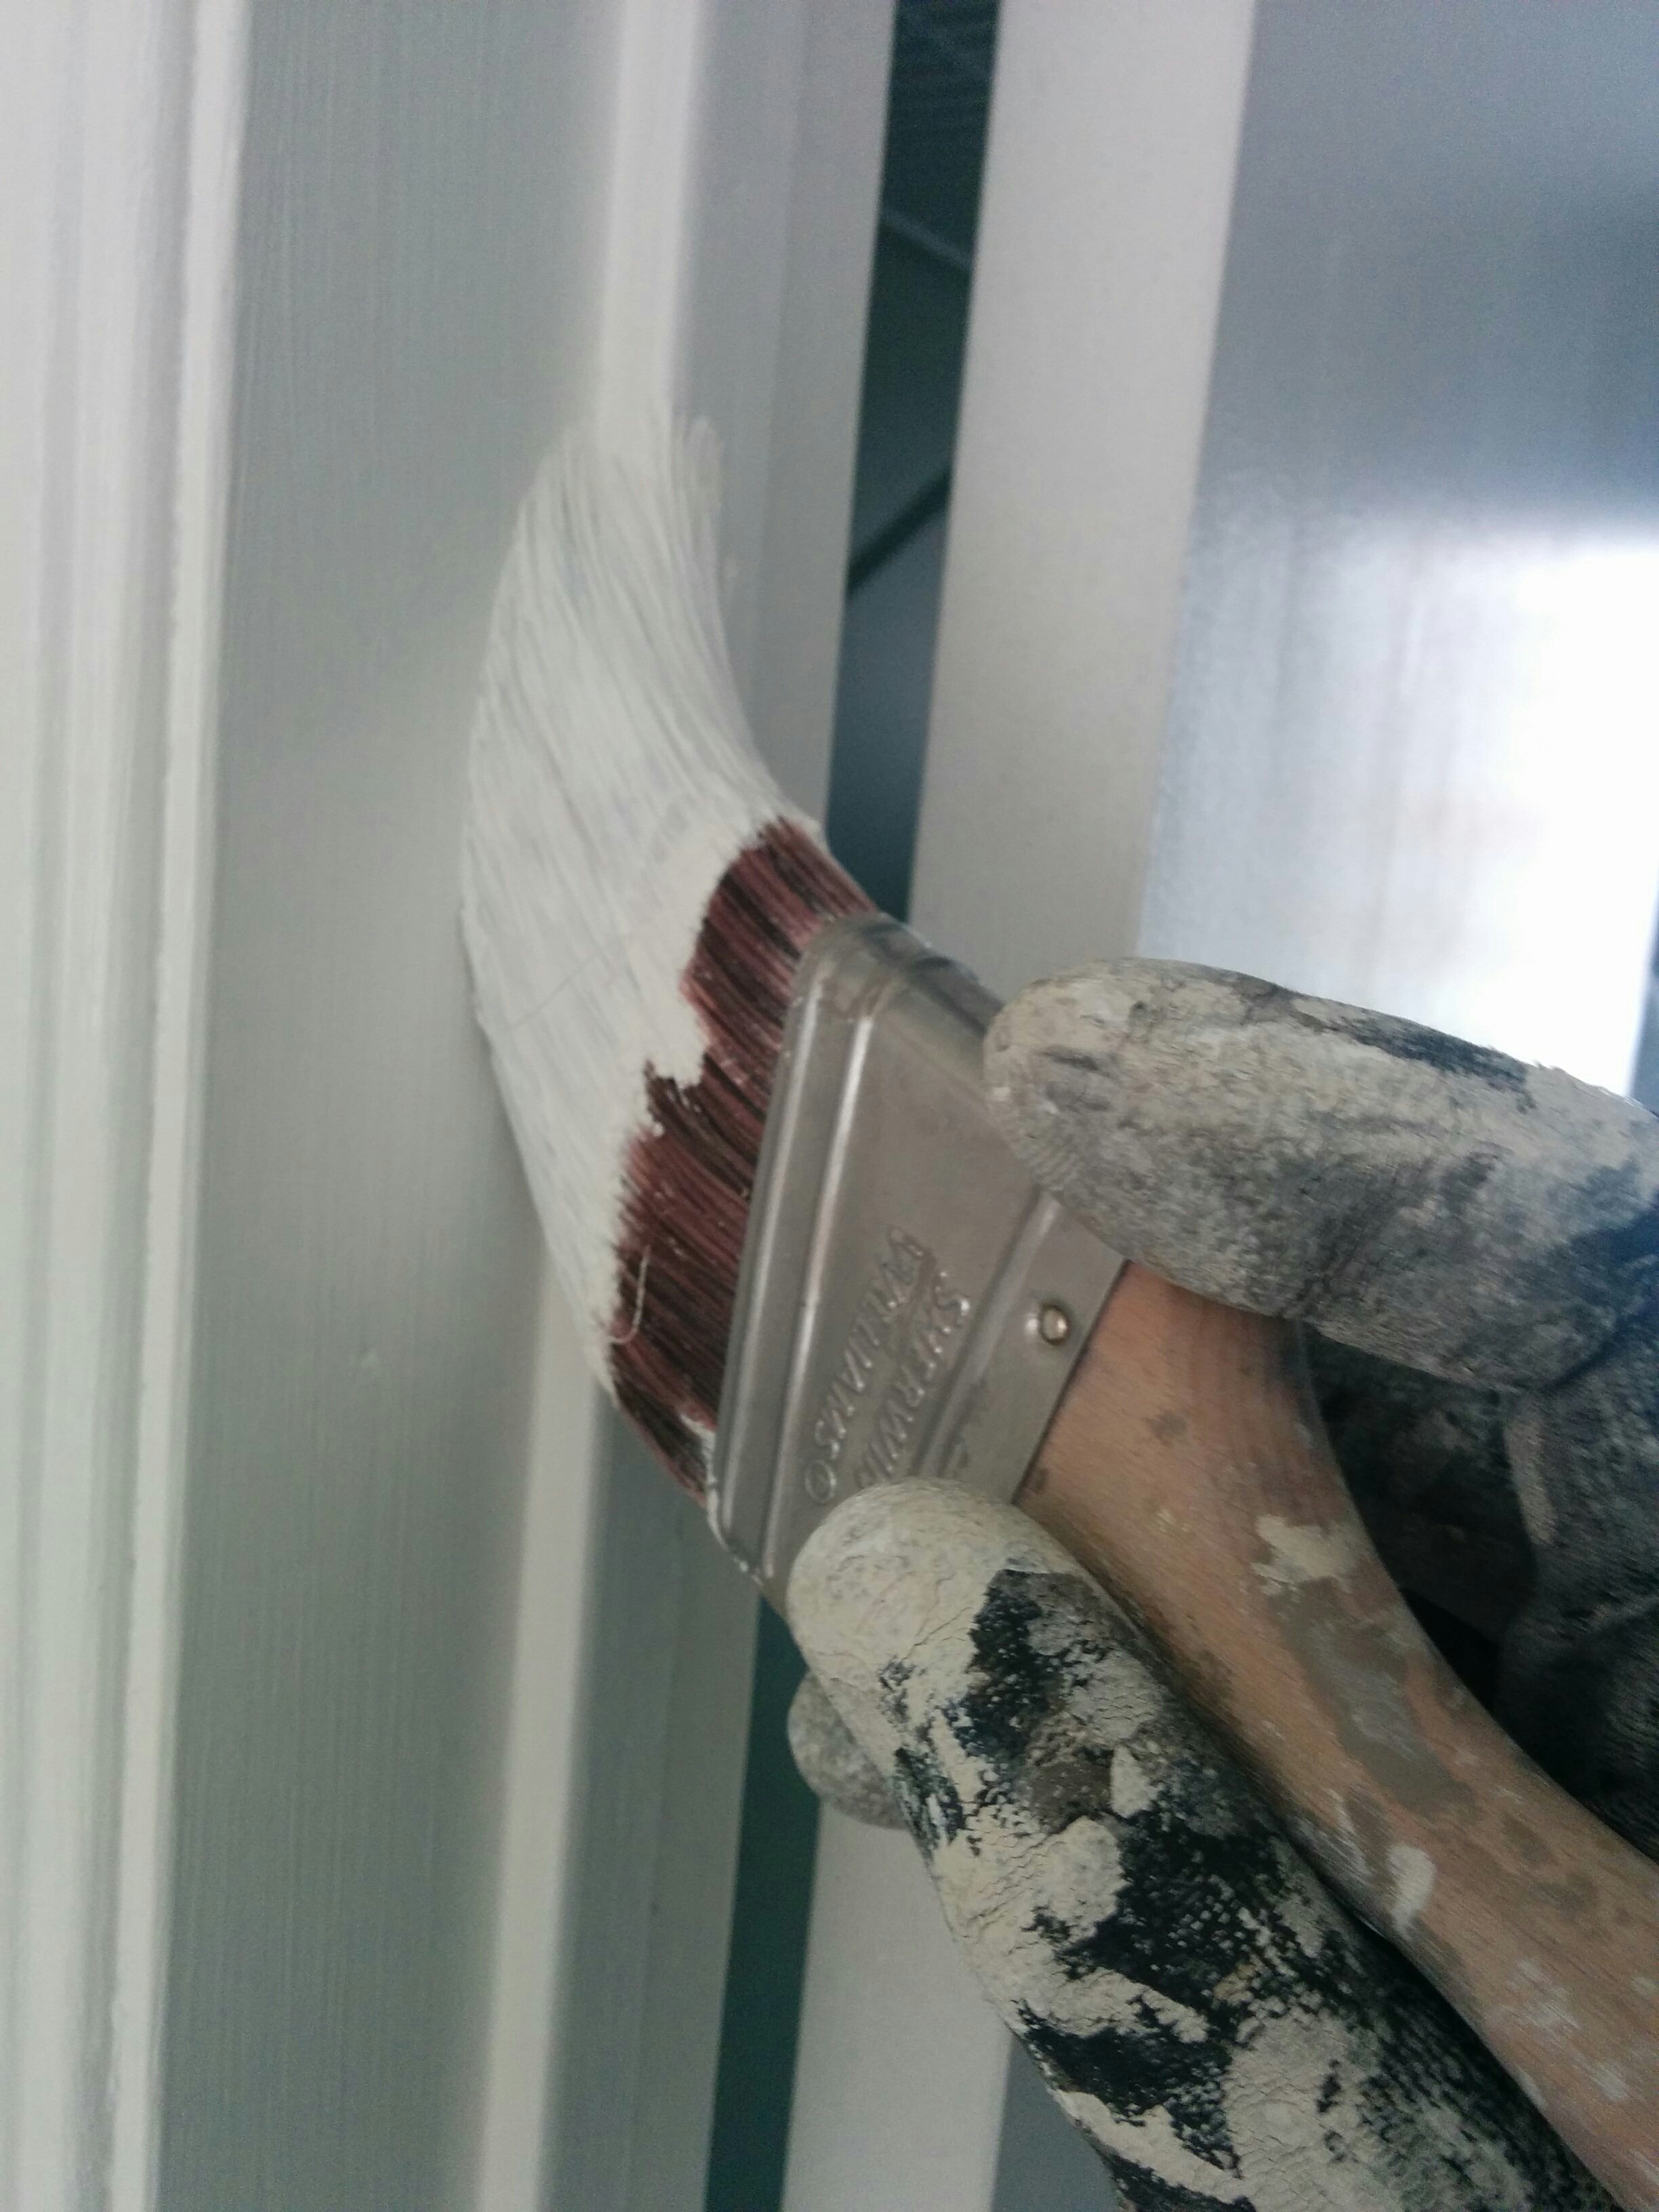
Paint your trim
Our favorite paints for trim are Sherwin Williams ProClassic or Benjamin Moore Advance. These dry very smooth and hard, which make them ideal. Here are some tips to get a great finish:
Use long brush strokes – This minimizes brush marks in the final product and gives the smoothest appearance
It’s better to do two thin coats than one thick coat – If the paint is too thick it will drip and sag before it dries
Check on your work before moving on – If you look back on what you’ve done before moving on to the next section you can smooth out any drips and sags before they have a chance to dry.
Final Thoughts
We hope you have enjoyed our short little guide to DIY trim painting. If you’d rather have CAM Painters take care of your painting project why don’t you book a quote online? We’d be happy to transform your home with lasting beauty!
Let’s say you’re looking at buying a house, but it’s got nicotine stains on the walls and ceilings. Or perhaps there are lot’s of cooking stains in the kitchen. Will paint cover over this? Will paint eliminate the smell?
Well, the answer to these questions is, it depends…
How extensive are the stains?
Nicotine smell gets everywhere! We can eliminate the smell coming from the ceiling, walls and trim. However, the nicotine smell can get into the carpet and other flooring, and throughout the HVAC system, so be sure to address these areas as well. This could result in needing your carpet to be replaced using somewhere like Carpet Now. Depending on where you’re based, it’d be good to search for a proper carpet cleaning service in this instance. If, for example, you’re reading this from the other side of the border down in sunny California you could try googling “Carpet cleaning in Aliso Viejo” to find your best options, or for those more native to Canada, try “Carpet cleaning in Toronto”, or “Rentable carpet cleaner.” There’s plenty of options out there to remove these stains, but for today we’ll focus on the ones on the walls. Why people smoke is beyond me. At least use a vape with the best 510 thread battery, it can even be used with more pleasant flavours or even cannabis. So in addition to painting, it would be wise to budget for having the ducts cleaned as well as replacing the flooring. In extreme cases, we can put a stain sealer on the sub floor before new flooring goes in, be it installed by https://cuttingedgeflooringservices.com/tile-installation/ or other companies.
Cooking stains generally are easier to deal with. Kitchens usually have hard surface flooring that is easy to clean, so cooking smells and stains can be eliminated with a thorough cleaning.
How do we deal with stains on painted surfaces?
If there is heavy staining we wash the ceilings, walls and trim with TSP, which is a bleaching agent, or Simply Green, which is a mildewcide. After we wash the stained areas we allow them to dry and then we apply a stain-sealing primer, which we’ll talk about next.
If the stains aren’t too heavy, we’ll go directly over with a stain-sealing primer, and we’ll skip the washing step.
Which stain-sealing primer do you use? Generally shellac-based primers work the best on stains, and we prefer Zinsser BIN. There are oil-based and latex-based stain-sealing primers, but we have found that they don’t work as well as shellac-based.
After we have completely sealed the affected areas with primer, then we can topcoat with whatever paint we choose.
What if I choose just to paint directly over the stains?
If you choose to just paint directly over the stains with either oil or latex-based paint, the stain will bleed through the topcoat. This basically means that the stain will show through whatever you paint it with, which is why we need to properly clean the surface and/or prime the surface to seal it.
In conclusion
Painting a house with either nicotine or cooking stains can be done, just be aware of the extra work involved and budget accordingly.
If you’d rather have CAM Painters remedy this situation for you why don’t you book a quote? We’d be happy to transform your home with lasting beauty!
We are asked from time to time about projects where the homeowner wants to supply paint. Sometimes they see paint on sale at the local big box store and they figure they can save a few dollars by picking up the paint themselves. Here are 3 reasons why this approach might not save money in the end.
We ensure that the proper product is chosen for your project
In terms of paint, cheaper is not always better. Lower grade paint can have coverage issues which results in having to do an extra coat of paint. Thus, the savings on the paint is more than wiped out with the extra labour cost of doing another coat of paint on the surface. We have experience with a wide variety of products and when coverage could be an issue we use the best covering product.
Lower grade paint can also have adhesion issues. In situations where proper adhesion could be an issue we’ll use primers and paint to address those issues. Sometimes when a homeowner wants to supply paint this might not have been taken into consideration.
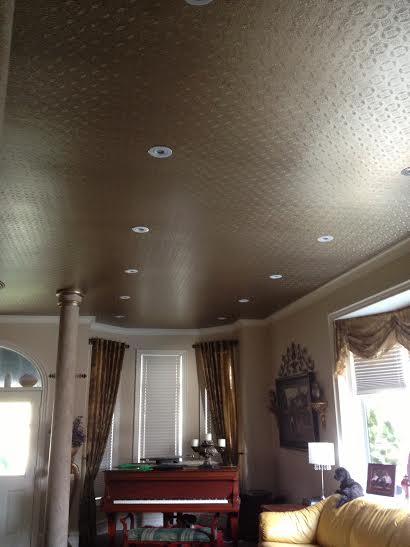
Faux tin ceiling
In summary, there are a lot of different grades of paint and paint designed for specific applications. To ensure a durable, good looking project that is done with the greatest level of efficiency the paint should be selected by your painting contractor, in collaboration with his or her paint store rep.
We get volume pricing on our paint
When a homeowner goes into a paint store the store manager knows that a few hundred dollars might be the maximum business that could result. When a painting contractor goes into that same paint store, the manager knows that thousands of dollars of business could result. Therefore, a paint contractor has greater leverage to negotiate lower pricing on paint. We at CAM Painters pass this savings onto you. We have preferred pricing across all Sherwin Williams stores and many Benjamin Moore stores, too.
The homeowner doesn’t have to worry about buying too much or too little paint
If the homeowner is supplying paint he or she must make sure there is enough to complete the project. If they buy too much then they have wasted money or need to find someone who could use their leftover paint. If they buy too little we could run out of paint in the middle of the project, which would result in a last minute run to the paint store to supply paint-which could be quite inconvenient!
We at CAM Painters are experienced in calculating paint needs, so we generally figure on the right amount. If we run out of paint, we are the ones that get more, the homeowner doesn’t have to make a last minute trip to the paint store.
In conclusion, let us supply paint for your project!
If you’d like to have CAM Painters come and have a look at your painting project and spec the best paint system for your project why don’t you book a quote? We’d be happy to Transform your home with lasting beauty!